One helpful example of how computers can save you time is to let Word 2013 create a table of contents (TOC) from your document. No, there’s no need to manually type a TOC. As long as you use the built-in heading styles, Word can slap down a custom TOC in your document as easily as following these steps:
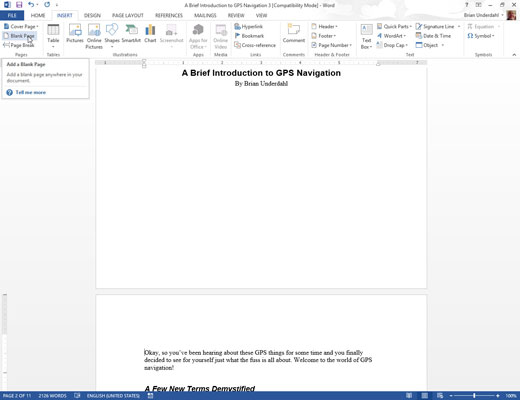
Create a separate page for the TOC and click the mouse to place the insertion pointer on the new, blank page.

The TOC is inserted at that point.
Click the References tab and click the Table of Contents button.

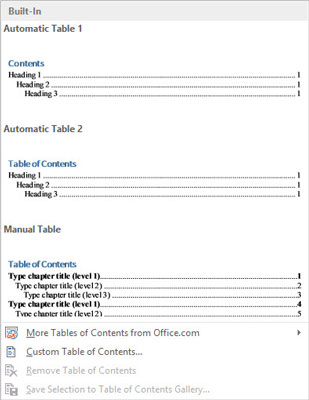
The Table of Contents menu appears.
Choose an item from the menu based on what you want the table of contents to look like.

And there’s your TOC, page numbers and all.
You may have to scroll up to see the table of contents. You may also want to add a title above the TOC — something clever, such as Table of Contents.
Cool people in publishing refer to a table of contents as a TOC, usually pronounced tee-o-see (or tock).
Things change. To update the TOC, click once to select it. Then Click the Update Table button on the References tab. Use the Update Table of Contents dialog box to choose what to update. Click OK.
Word bases the TOC on text formatted with the Heading styles in your document. As long as you use Heading 1 for main heads, Heading 2 for subheads, and Heading 3 (and so on) for lower-level heads and titles, the TOC is spot-on. Or you can use your own heading styles, if you format them with a specific outline level.
The table of contents exists as a field in your document.


