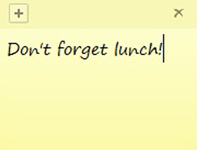
They remain securely wherever you put them on the desktop until you delete them!
To create a Sticky Note, click Start→All Programs→Accessories→Sticky Notes.
Windows opens a new blank note on the desktop, positioning the cursor at the beginning of the note.
Type the text of the note.

Format it like you would a post-it.
You can also format the note text if you want.
Just select the desired text and then press the appropriate shortcut key: Ctrl+B for bold text, Ctrl+I for italics, and Ctrl+U for underlining.
You’ll notice that the text automatically wraps to a new line, and if your text doesn’t fit on the note, Windows automatically expands the height of the note to accommodate the length of your note.
When you finish entering the note text, simply click somewhere on the desktop outside the sticky note itself.

Alternatively, you can click the New Note button (the one with the plus sign) to start a new sticky note. The note you create will stay on the desktop.
If you use sticky notes, you’ll want to get acquainted with the Sticky Notes Quick Launch button on the taskbar. Click it once to temporarily hide all the sticky notes on your desktop. To bring all of your sticky notes back to the desktop or to the top of the windows on the desktop, click it again.
To color-code a sticky note, right-click the note and then click the color you want.
Your choices here are Blue, Green, Pink, Purple, White, or Yellow.
To delete a note that you no longer need, click its Delete button in the upper-right corner.
The first time you delete a note, Windows asks you to confirm the deletion. If you don’t want to see this alert again, select the Don’t Display This Message Again check box before you click Yes.


