The Rules Wizard is called a wizard because of the way the program leads you step by step to create each rule. The process is pretty simple. To create a simple rule to move an incoming message from a certain person to a certain folder, follow these steps:
Click the Inbox icon in the Folder pane of the Mail module (or press Ctrl+Shift+I).
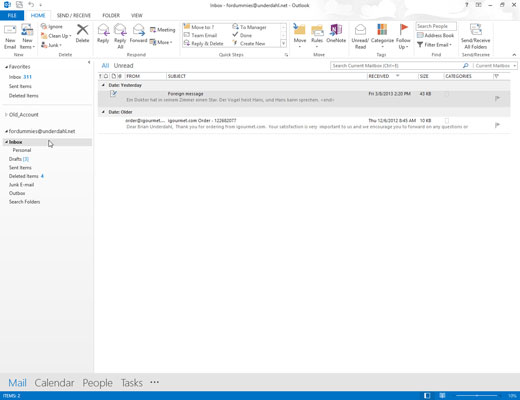
The Mail module appears.
Select the Home tab, click the Rules button in the Ribbon, and then click Manage Rules & Alerts.
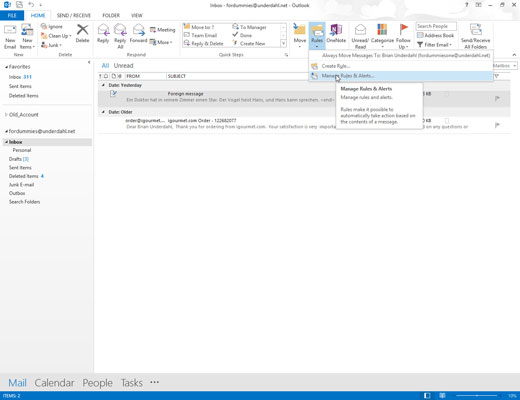
The Rules and Alerts dialog box appears. Don’t click Create Rule — it gives you a limited number of options based on whichever message is currently selected. Selecting Manage Rules & Alerts opens the Rules and Alerts dialog box; but you’re still one click away from the Rules Wizard.
Click the New Rule button.
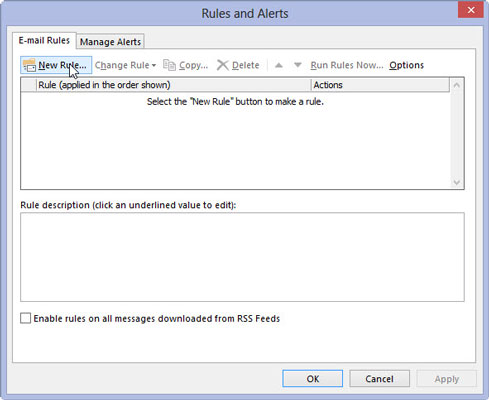
The Rules Wizard dialog box appears. The dialog box contains a list of the types of rules you can create.
Choose the type of rule you want to create.
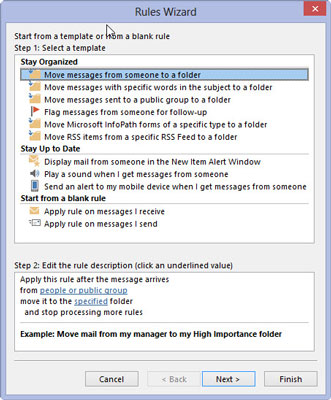
The Rules Wizard offers several common types of rules you may want to create, such as moving messages from someone to a folder, moving messages with specific words in the subject to a folder, or moving messages sent to a public group to a folder. The collection of suggested rules is divided into useful categories such as Stay Organized and Stay Up to Date.
Choose Move Messages from Someone to a Folder. Click the Next button, and after doing so, you see this message in the rule description box at the bottom of the dialog box: Apply This Rule After the Message Arrives from People or Public Group Move It to the Specified Folder and Stop Processing More Rules. (That’s a mouthful, but Outlook understands.)
In the Select Conditions box, make sure that the From People or Public Group Selection has a check mark in front of it.
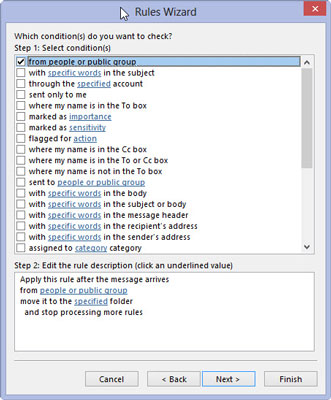
Then click the first piece of underlined text in the rule description box, which says People or Public Group.
The Rule Address dialog box appears.
Double-click the name of each person whose messages you want to move to a new folder.
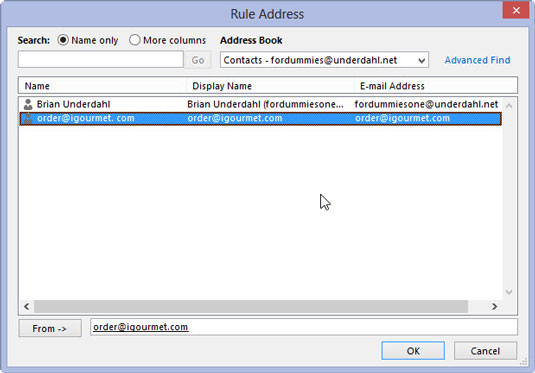
The e-mail address of each person you choose appears in the From text box at the bottom of the Rule Address dialog box.
Click the OK button when you've chosen all the people whose messages you want to move.
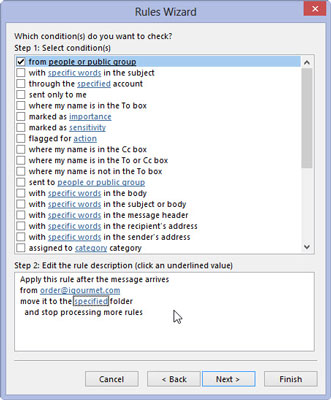
The Rule Address dialog box closes, and the names you’ve selected replace the words People or Public Group in the rule description box.
Click the next piece of underlined text in the rule description box, which says Specified.

Another dialog box opens, offering you a choice of folders to which you can move the message.
Double-click the name of the folder to which you want to move messages. Click the Finish button.
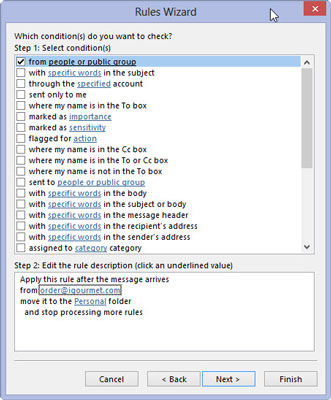
The dialog box closes, and the name of the folder you chose appears in the sentence in the rule description box. You can add more conditions to the rule if you want (such as Where My Name is in the Cc Box) by selecting them from the Select Conditions box.
If you press the Next button a couple more times, you can also add actions (such as Clear the Message Flag) and exceptions (such as Except If Sent Only to Me) to your rule.
The Rules and Alerts dialog box appears after you click Finish, providing a list of all your rules. Each rule has a check box next to it. You can turn rules on and off by selecting or deselecting the check boxes. If a check mark appears next to a rule, it’s turned on; otherwise, the rule is turned off.
Click the OK button to close the Rules and Alerts dialog box.


