The most common thing to mail merge in Word 2013 is the standard, annoying form letter. However annoying it is, knowing how to create one will come in handy. Here’s how you start that journey:
Start a new, blank document.
You can do it from the ribbon or just press Ctrl+N. Either way, you get the same screen.
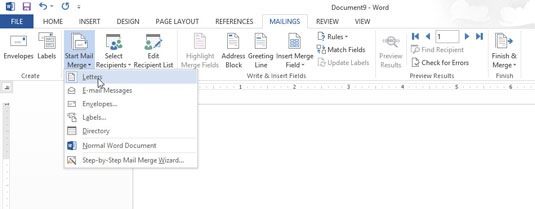
On the Mailings tab, from the Start Mail Merge group, choose Start Mail Merge→Letters.

This will give you the necessary format.
Type the letter.
You’re typing only the common parts of the letter, the text that doesn’t change for each copy you print.
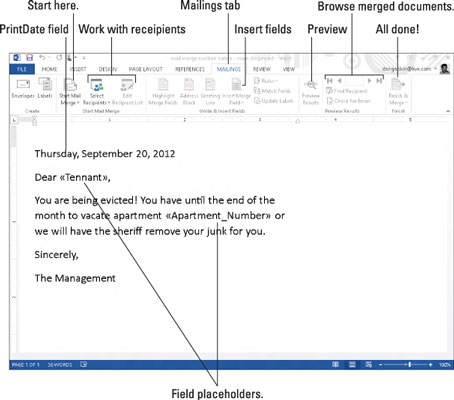
Type the fields you need in ALL CAPS.

Type in ALL CAPS the text to be replaced or customized in your document. Use short, descriptive terms.
You can insert a PrintDate field in the document. That way, the documents all have today’s date on them when they print.
Save the main document.
If you already saved the document as you were writing it, give yourself a cookie.
After you create your letter, the next step is to create or use a recipient list.


