Sharpening is a software process that adjusts contrast in a way that creates the illusion of slightly sharper focus — emphasis on the word slightly. Sharpening cannot remedy poor focus, but instead produces a subtle improvement to this aspect of your pictures.
The Canon camera offers the following Picture Styles, which are indicated in the displays by the initials shown in the list:- Auto (A): Analyzes the scene and determines which Picture Style is the most appropriate. (This setting is the default.)
- Standard (S): Produces the image characteristics that Canon considers as suitable for the majority of subjects.
- Portrait (P): Reduces sharpening slightly to keep skin texture soft.
- Landscape (L): Emphasizes greens and blues and amps up color saturation and sharpness.
- Fine Detail (FD): Offers extra sharpening and slightly more intense colors.
- Neutral (N): Reduces saturation and contrast slightly compared to how the camera renders images at the Standard setting.
- Faithful: Renders colors as closely as possible to how the human eye perceives them.
- Monochrome: Produces black‐and‐white photos.
When you select this setting and set the Quality option to Raw, cRaw, or a Raw+Large/Fine combination, the camera displays your JPEG image on the monitor in black and white during playback. But during the Raw conversion process, you can go with your black‐and‐white version or view and save a full‐color version. Even better, if you shoot only in Raw, you can process and save the image once as a grayscale photo and again as a color image.
If you don’t capture the image in the Raw or cRaw format, you can’t access the original image colors later. In other words, you’re stuck with only a black‐and‐white image. For this reason, shooting in the Monochrome Picture style in JPEG only isn’t a great idea.
- User Def. (1, 2, and 3): You can create and store three of your own Picture Styles. More on that possibility a little later.
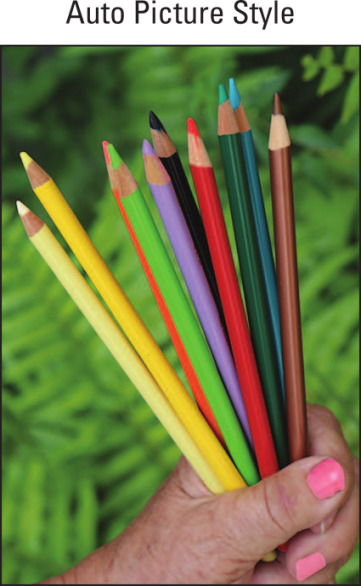
 Here’s how the Auto Picture Style on your Canon camera rendered the example image.
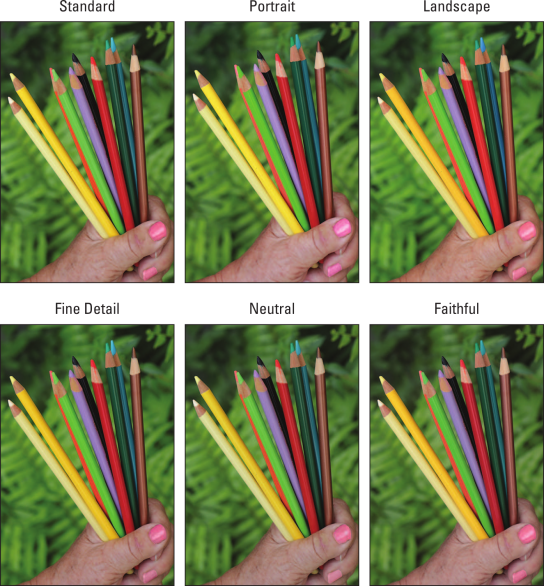
The image below shows the variations produced by the other full-color Picture Styles.
 And here are the variations produced by the six other full-color Picture Styles on the Canon EOS Rebel T8i/850D.
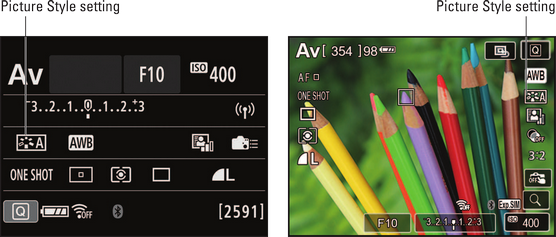
You have control over the Picture Style setting only in the P, Tv, Av, M, and Movie modes. In the Quick Control screen and Live View displays, the symbol labeled below represents the current setting. (In Movie mode, the symbol appears in the same spot as in Live View still‐photography mode.)
 This symbol represents the Picture Style on your Canon camera.
To change the Picture Style setting, use these methods:
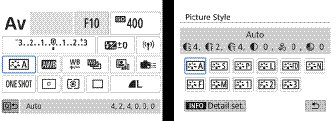
- Quick Control method: After shifting to Quick Control mode, highlight the Picture Style icon and then rotate the Main dial or Quick Control dial to cycle through the available styles. To see all styles on a single screen, press Set or tap the Picture Style icon. On that second screen, highlight the style you want to use and press Set to finish up. Or just give the setting a quick tap on the touchscreen.
 You can select a Picture Style via the Quick Control screen.
The image above shows the Quick Control screens as they appear during viewfinder photography. In Live View and Movie mode, the screens vary in appearance, but the process of selecting and adjusting the setting is the same.
- Shooting Menu 3: Select Picture Style from the menu to display a variation of the selection screen shown on the right above.
- Bottom edge of the Quick Control dial (viewfinder shooting only): When you’re not in Live View or Movie mode, you have an even faster option for getting to the Picture Style setting: Just press the bottom edge of the Quick Control dial — where you see the symbol that decorates the Picture Style setting in the displays. The following image offers a look.
 During viewfinder photography, pressing the bottom of the Quick Control dial takes you directly to the Picture Control settings screen.
Now for the question on everyone’s mind: What the heck is the deal with all the crazy numbers and symbols that appear in the Picture Control settings screens? Well, in their very Canon-like cryptic style, the symbols represent specific picture characteristics, such as sharpness, color saturation, and contrast. The number values indicate the strength at which those characteristics are applied to the picture when the camera processes the image data. But the different characteristics are based on different number ranges, so those values aren’t a big help unless you spend time researching and understanding them.
So why does Canon go to the trouble of including these details? Because you can modify a Picture Style by adjusting the values for the various picture characteristics. Unless you’re tickled pink by the prospect of experimenting with Picture Styles, however, stick with the default setting (Auto) and ignore the fine-tuning options. Why add one more setting to the list of options you have to remember, especially when the impact of changing it is minimal?
Second, if you want to play with the characteristics that the Picture Style options affect, you’re better off shooting in the Raw format (or its sibling, cRaw) and making those adjustments on a picture‐by‐picture basis in your Raw converter. For these reasons, this book presents just this brief introduction to Picture Styles, making room for functions that make a bigger difference to your photographic success. For details on Picture Style features not covered here, consult the camera manual.To learn more, check out our Canon EOS Rebel T8i/850D Cheat Sheet.


