An event isn't an event without attendees. For public events, you can use the promotional tools available through Eventbrite. But, how do you invite specific people to your private event? Suppose you are organizing a family reunion. You've done the hard work, set the date and time, booked the location, decided on food, and made a guest list. Now, it's time to let Eventbrite send out the invitations for you.
First, of course, you have to have set up your event through Eventbrite. Create your event page and make your event live. Then follow these steps to have Eventbrite send the invitations:
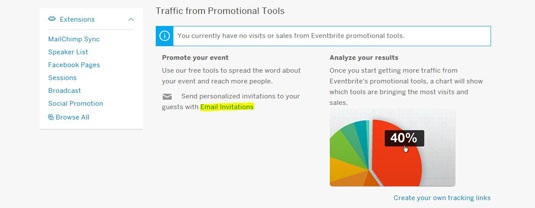
On your Event Dashboard, click Email invitations.
Source: Eventbrite.com
The Create email invitations page appears.
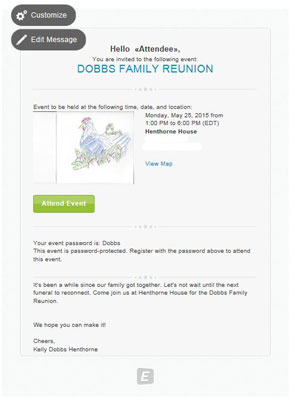
Select the type of invitation you want: Formal or Modern.
Source: Eventbrite.com
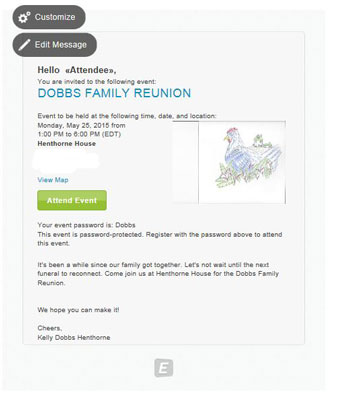
This is the “Formal” invitation. For a family reunion, this seems a little stiff, so try the more relaxed “Modern” invitation.
Click the Edit Message button on your sample Modern invitation.
Source: Eventbrite.com
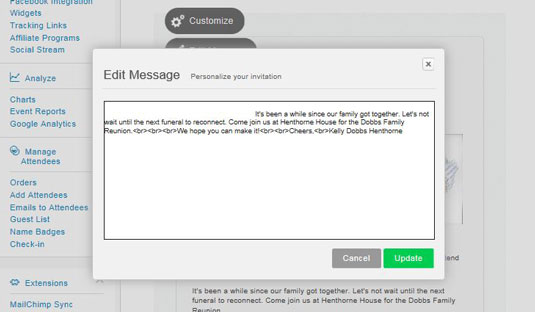
The Edit Message dialog box appears.
Make any changes you'd like to the text message.
Source: Eventbrite.com
Note that the text in the dialog box contains codes for the spacing and formatting of the message. After you wrap up your purple prose, click the Update button to see your changes in action.
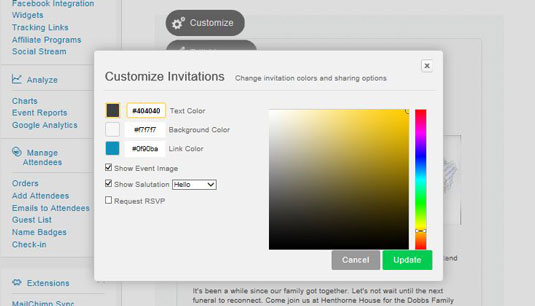
Click the Customize button to make changes to the invitation's colors and sharing options.
Source: Eventbrite.com
The Customize Invitations dialog box appears. Here, you can adjust the colors of the text, the background, and even the hyperlink. You also can select to show the image (called the logo when you created the event), change the salutation (Hello, Hi, Greetings, Dear, or None), and request an RSVP (basically, asking invitees to register for the event.
Make any changes and click Update or decide you like the way your event page appears and click Cancel.
Click Add Guests on the Event Dashboard.

Source: Eventbrite.com
The Add Your Guests dialog box appears. If you use Gmail, you have the advantage here, and Eventbrite will import contacts from your Gmail account. Otherwise, you can manually enter email addresses, upload emails from Outlook, or another file. (Note that you can import from a database, spreadsheet, or text file.)
The Create email list from attendees of past events won’t help you when you organize your first reunion, but the next time around, you can have Eventbrite pull up all the information from the first reunion and invite the same attendees.
Choose your email address input method and click Update.

Source: Eventbrite.com
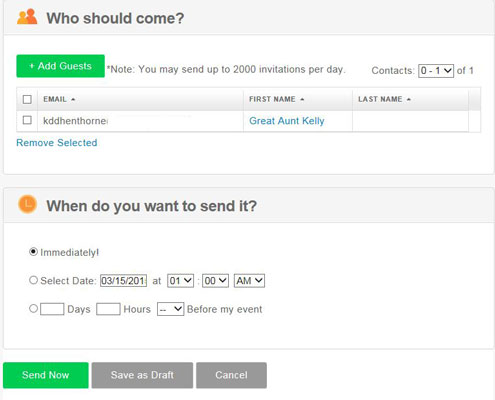
You can send as many as 2000 invitation per day. Add the first names of your contacts. Especially for a family reunion or other informal event, you might want to type Grandma or Me-maw or Little Mikey instead of relying on formal names here.
If you click in the First Name field, a dialog box pops up asking for first and last names (the email address is already added).
Click Save Contact.
Source: Eventbrite.com
In the When do you want to send it? area, click Immediately or set a date and time before your event.
Click Send Now.
Source: Eventbrite.com
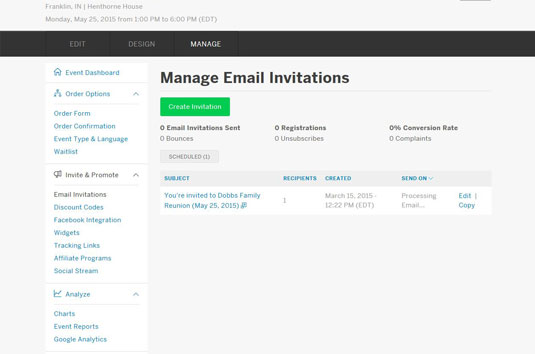
The Manage Email Invitations page appears, and you can see when your invitation(s) will be delivered by Eventbrite.


