Your Canon Digital Rebel makes it easy to take photos of fast moving objects — whether you're taking pictures of your teen on the basketball court, a romping dog, or a passing bicyclist. While you can use the camera’s Sports mode to get decent action photos, follow these steps to get even better pictures.
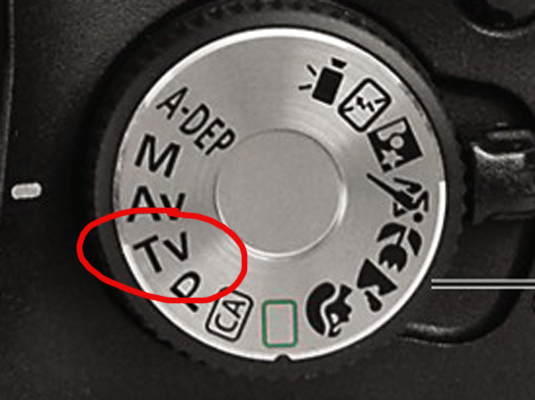
Set the Mode dial to Tv (shutter-priority autoexposure).

In this mode, you control the shutter speed, and the camera takes care of choosing an aperture setting that will produce a good exposure. If you aren’t ready to step up to this advanced exposure mode, try using Sports mode—but be aware that you have no control over many other aspects of your picture (such as white balance, flash, and so on) in that mode.
Rotate the Main dial to select the shutter speed.
Because Tv mode is activated, the Main dial adjusts the shutter speed. After you select the shutter speed, the camera selects the aperture (f-stop) necessary to produce a good exposure.
What shutter speed do you need exactly? Well, it depends on the speed at which your subject is moving, so some experimentation is needed. But generally speaking, 1/500 second should be plenty for all but the fastest subjects (race cars, boats, and so on). For very slow subjects, you can even go as low as 1/250 or 1/125 second.
If the aperture value blinks after you set the shutter speed, the camera can’t select an f-stop that will properly expose the photo at that shutter speed.
Raise the ISO setting or add flash to produce a brighter exposure, if needed.
In dim lighting, you may not be able to get a good exposure without taking this step. Raising the ISO does increase the possibility of noise, but a noisy shot is better than a blurry shot. The current ISO setting appears in the upper right corner of the Shooting Settings display; press the ISO button to adjust the setting.
Adding a flash is tricky, unfortunately. First, the flash needs time to recycle between shots, so try to go without if you want to capture images at a fast pace. Second, the built-in flash has limited range — so don’t waste your time if your subject isn’t close by. And third, remember that the fastest possible shutter speed when you enable the built-in flash is 1/200 second, which may not be fast enough to capture a quickly moving subject without blur. (You can use a faster shutter speed with some Canon external flash units.)
If you stick with Tv mode and raise the ISO above 800 or so, you may want to enable High ISO Speed Noise Reduction to help alleviate noise. However, doing so can slow down the speed at which you can capture images, so it’s a bit of a tradeoff.
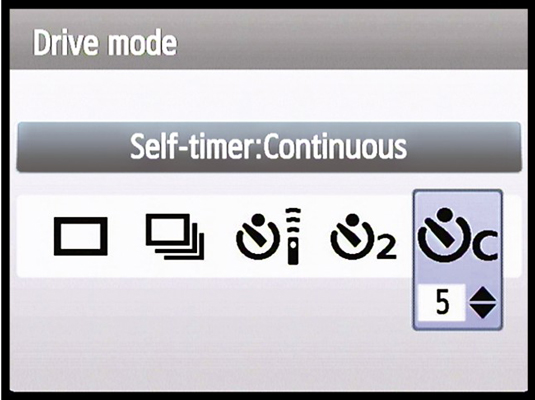
For rapid-fire shooting, set the Drive mode to Continuous using the left cross key.

In this mode, you can take a little more than three pictures per second. The camera continues to record images as long as the shutter button is pressed.
You can switch the Drive mode by pressing the left cross key. The icon representing the current mode appears in the Shooting Settings display. Make sure the display shows an icon that looks like a stack of pictures, shown here, second from the left.
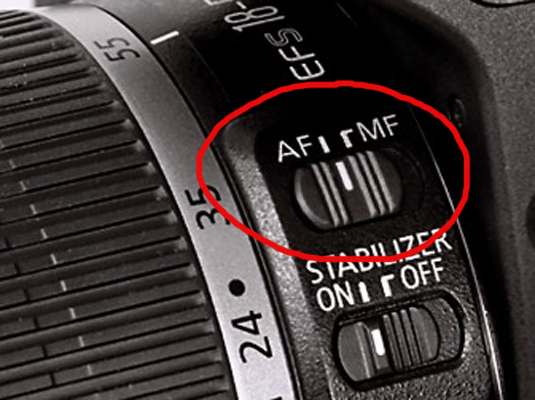
For fastest shooting, switch to manual focusing using the lens switch.

Manual focusing eliminates the time the camera needs to lock focus in autofocus mode. You select manual focus by setting the lens switch to MF, as shown here.
If you do use autofocus, try these two autofocus settings for best performance: Set the AF Point Selection mode to Automatic . Set the AF mode to AI-Servo (continuous-servo autofocus).
Turn off automatic image review to speed up the camera even more.
Turn off Image Review via the Shooting Menu 1. Turning the option off can help speed up the time your camera needs to recover between shots. (To access the menu, use the Menu button. You can adjust settings using the cross keys.)
Compose the subject to allow for movement across the frame.
The view must be wide enough that the subject won’t fly out of the frame – at least, not too quickly. You may need to zoom out to achieve this. You can always crop the photo later to a tighter composition.
Lock in autofocus (if used) in advance by pressing the shutter button halfway.
Your image-capture time is faster because the camera has already done the work of establishing focus. Remember that in AI Servo mode, you must keep the subject under the active autofocus point (or points) for the camera to maintain focus.
Press the shutter button completely
Finally, you’re taking the photo.


