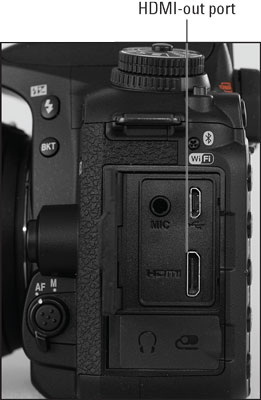
To connect the two devices, you need a Type C mini-pin HD cable. Nikon doesn't make its own cable, so just look for a quality third-party version. Next, set HD preferences by opening the Setup menu and choosing HDMI. You're offered these options:
- Output Resolution: By default, the camera decides the proper HD video resolution to send to the TV after you connect the two devices. But you can also choose a specific resolution through this option.
- Advanced: Choose this option to reveal the following settings, which control a few more aspects of how the camera feeds the video signal to the TV.
- Output Range and Output Display Size: Leave these two settings at their defaults unless your TV manual suggests otherwise. The Output Range setting controls the range of brightness levels in the video picture; the Output Display Size option determines whether the camera slightly reduces the dimensions of the display to ensure that everything is visible on your monitor.
- Live View On-screen Display: Turn this option on to display the data that normally appears on the camera monitor during Live View shooting.
- Dual Monitor: Enable this option to view the display both on the camera monitor and the HD screen.
 The HDMI-out port is located here.
At this point, you (or your favorite media tech person) needs to figure out where to connect the other end of the HD cable. You may need to connect it directly to the TV or to another HD-input device that's part of your system. You may also need to change certain input settings on your TV or other HD device. When everything's good to go, turn on your camera to send the signal to the TV set. Control playback using the on-camera controls. The only exception is that when you play movies, you must use the TV's remote control to adjust sound volume.


