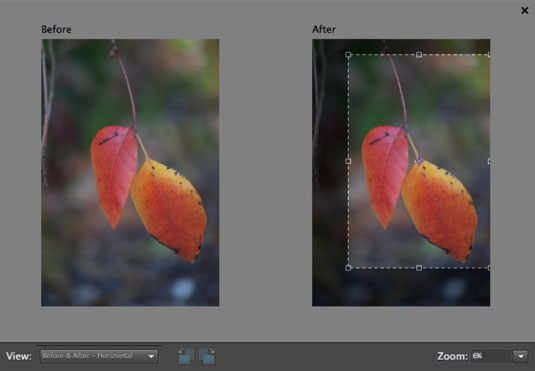
You can use Photoshop Elements to crop your images prior to exporting them for e-mail, posting them on a website, or creating prints. To do so, specify the image size and resolution. You can also crop your images to a specific aspect ratio or a specific size.
Launch the Photoshop Elements Organizer and choose the image you want to crop.
You can crop your landscape and nature images to remove unwanted items, such as too much background or other distracting elements. You can also crop an image to a specific size and resolution.
From the Fix drop-down menu, choose Full Photo Edit or Edit Quick.
Your choice depends on how much work you need to do to the image. If all you want to do is crop the image and apply minimal edits, choose Edit Quick.
Select the Crop tool and choose an option from the Aspect Ratio drop-down menu on the Option bar.
The default option is No Restriction, which lets you crop the image to any aspect ratio. You can also choose to crop the image while maintaining the aspect ratio of the image by choosing the Use Photo Ratio option or by choosing one of the preset sizes, such as 4 x 6. Alternatively, you can enter the desired dimensions in the Width and Height text fields.
Enter the desired image resolution in the Resolution field.
If you’re cropping images for the web, enter 96 or 72 pixels per inch. If you’re cropping an image for print, specify 300 pixels per inch or the resolution specified by the printing service you’re using.
Drag inside the image to specify the crop area.

The crop area is signified by a border of dotted lines and eight handles. The handles are used to resize the area to which the image is cropped.
Adjust the size of the crop rectangle.
Drag the corner handles to resize the width and height at the same time. Drag the handle in the middle of the top or bottom of the crop rectangle to change the height, or drag the handle in the middle of the right or left side of the crop handle to change the width.
If you’re cropping your image to a size or aspect ratio, dragging any handle changes the size of the rectangle proportionately.
Click inside the crop rectangle and drag to change its position.
When the crop rectangle is the desired size, click the green check mark below the lower-right corner of the rectangle to crop the image.
You can also click the red circle with the diagonal slash to remove the crop rectangle and leave your image unchanged.
Save your work.
When you make changes to an image, use the Save As command and save the image with a different filename in order to preserve the original.
If all you need to do is crop the photo, click the Fix button and choose Crop from the Photo Fix options menu. This opens the Crop Photo dialog, which contains the Crop tool and other options. You can also choose from one of the presets.


