Once you are familiar with all the whys and wherefores of the Live View autofocusing options on your Nikon D5300, the following summary of steps outlines choosing the autofocus settings and then actually setting focus:
Choose the Focus mode and AF-area mode.
You adjust both settings via the control strip that appears when you press the i button. Remember that the camera doesn’t let you access all settings in certain exposure modes.
If you set the Focus mode to AF-F, the autofocus system perks up and starts hunting for a focus point immediately.
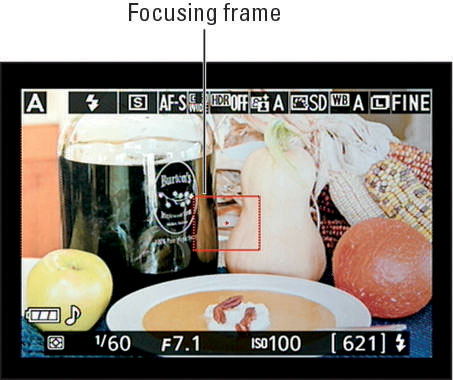
Locate the focus frame in the Live View display.

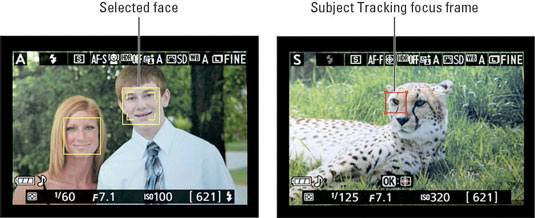
The frame appearance depends on the AF-area mode:
Wide Area and Normal Area: You see a red rectangular frame.
Face Priority: If the camera locates faces, you see a yellow focus frame around each one. The brackets indicate the face that the camera will use to set focus—typically, the closest person.
If you see a plain red frame, the camera can't detect a face and will set focus as it would if you were using Wide Area mode.

Subject Tracking: A focusing frame appears.
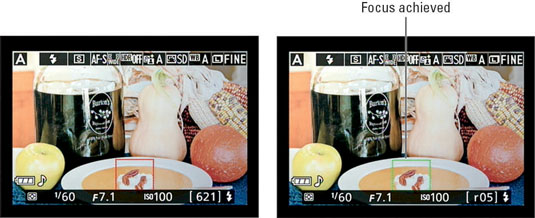
In AF-F mode, the frame turns green when the object under the frame is in focus. The frame blinks any time focus is being reset.
Press the Multi Selector up, down, right, or left to position the focusing frame over your subject.

A couple of tips for positioning the frame:
In Face Priority mode, use the Multi Selector to move the box with the double yellow border—which indicates the final focusing point — from face to face in a group portrait.
In Wide Area and Normal Area modes, press OK to quickly move the focus point to the center of the frame.
In Subject Tracking AF-Area mode, press OK to initiate focus tracking.
If your subject moves, the focus frame moves with it. To stop tracking, press OK again. (You may need to take this step if your subject leaves the frame—press OK to stop tracking, reframe, and then press OK to start tracking again.)
In AF-S Focus mode, press the shutter button halfway to start autofocusing. Wait for the focus frame to turn green.
The appearance of the frame depends on the AF-Area mode.
What happens next depends on the Focus mode:
AF-S: You also hear a little beep (assuming that you didn’t disable the beep, which you can do via the Beep option, found in the Shooting/Display section of the Custom Setting menu). Focus is locked as long as you keep the shutter button pressed halfway.
AF-F: Focus is adjusted if the subject moves. The focus frame turns back to red (or yellow or white) if focus is lost; when the frame turns green and stops blinking, focus has been achieved again. You can lock focus by pressing the shutter button halfway. In most cases, the camera resets focus on your subject when you press the button, even if the focus frame is already green.
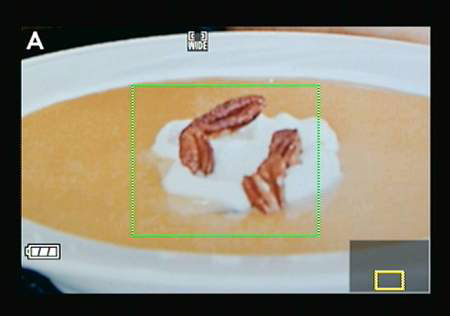
Press the Zoom In button to magnify the display to double-check focus.

Each press gives you a closer look at the subject. A small thumbnail appears in the lower-right corner of the screen, with the yellow highlight box indicating the area that’s being magnified. Press the Multi Selector to scroll the display if needed.
To reduce the magnification level, press the Zoom Out button. If you’re not using Subject Tracking mode, you can also press OK to quickly return to normal magnification.


