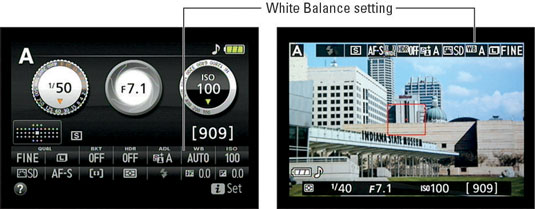
You can view the current White Balance setting in the Information and Live View displays on your Nikon D5300 digital camera. The icons you see here represent the Auto setting.

In Live View mode, colors in the preview are rendered according to the current White Balance setting. If you're unsure of which setting to use, just experiment: After you adjust the setting, the preview updates to show you the effect on photo colors.
You can adjust the White Balance setting in two ways:
Control strip: Activate the strip by pressing the i button. After highlighting the White Balance option, press OK to access the available settings, as shown on the right.

Shooting menu: You also can access the setting from the Shooting menu.

When you go the menu route, you can access the following advanced white balance features:
Fine-tune the settings. If you choose any setting but Fluorescent, pressing the Multi Selector right takes you to a screen where you can fine-tune the setting.
Select a specific type of fluorescent bulb. When you choose Fluorescent from the menu, pressing the Multi Selector right displays the second screen, where you can select a specific type of bulb. Select the option that most closely matches your bulbs and then press OK. Or, to go to the fine-tuning screen, press the Multi Selector right.
Create a custom white balance preset. Selecting the PRE option as the White Balance setting enables you to create and store a precise, customized White Balance setting. This feature provides the fastest way to achieve accurate colors when the scene is lit by multiple light sources that have differing color temperatures.

The selected White Balance setting remains in force for the P, S, A, and M exposure modes until you change it. Get in the habit of checking the setting before every shoot to make sure that you don't need to modify it. Otherwise, your pictures may take on an unwanted color cast due to an incorrect setting for the new lighting conditions.


