Video enthusiasts will appreciate the fact that the Nikon D7100 enables you to tweak a variety of movie-recording settings, such as frame size, frame rate, microphone volume, and the like. But if you're not up to sorting through all those options, just record your movies using the default settings. (You can restore the critical defaults by opening the Shooting menu and choosing Reset Shooting Menu.)
At the default settings, you get a full HD movie with sound enabled. Microphone volume is adjusted automatically, and the movie file is stored on the memory card in slot 1.
Here's how to shoot movies with the defaults:
Set the Mode dial on top of the camera to the P setting.
In this exposure mode, the camera takes care of movie exposure for you automatically. However, should something appear amiss with exposure or color, you can tweak a setting here and there to resolve the issue — something you can’t do in the Auto exposure mode.
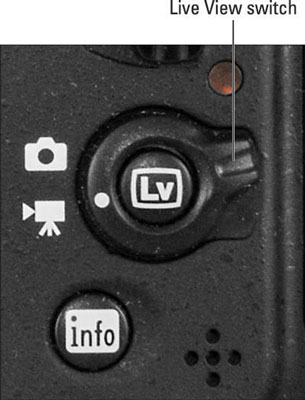
Set the camera to movie mode by rotating the Live View switch to the movie camera icon.

After setting the camera to movie mode, press the LV button to engage the Live View display.
Press the LV button to engage the Live View display.

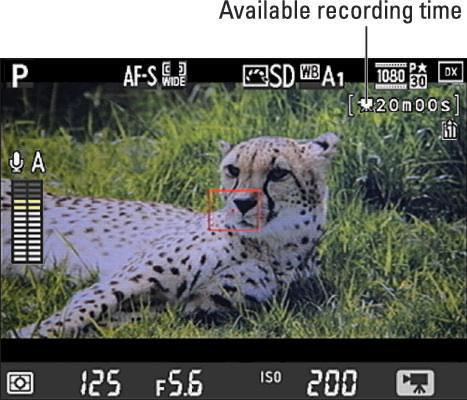
Press Info to change the display mode. Just pay attention to the available recording time readout, labeled in the figure.
To take advantage of continuous autofocusing, set the Autofocus mode to AF-F.
Select this setting by pressing the Focus-mode selector button while rotating the Main command dial. The camera starts focusing automatically and adjusts focus as necessary throughout the recording. You can lock focus at a specific distance by pressing the shutter button halfway.
If the Autofocus mode is set to AF-S, press the shutter button halfway to set and lock focus. You then can lift your finger off the shutter button; focus remains set unless you press the button halfway to reset focus.
To begin recording, press the red movie-record button on top of the camera.

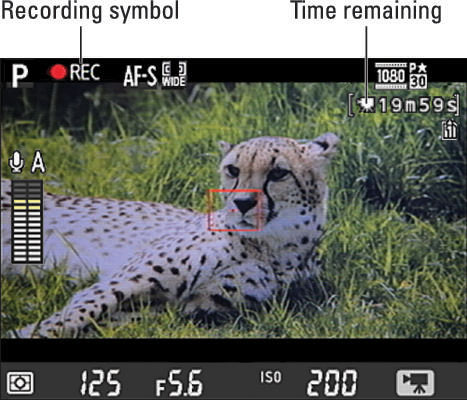
Most shooting data disappears from the screen, and a red Rec symbol flashes in the top-left corner. As recording progresses, the area labeled Time remaining in the figure shows you how many more seconds of video you can record.
To stop recording, press the movie-record button again.
Movies are created in the MOV format, which means you can play them on your computer using most movie-playback programs. You also can view movies in Nikon ViewNX 2, the free software provided with your camera.
You can stop your recording and capture a still image in one fell swoop: Just press and hold the shutter button down until you hear the shutter release. But because the camera remains in movie mode until you move the Live View switch to the still photography position, the picture is recorded using the movie frame area and has a 16:9 aspect ratio.
The resolution of the picture depends on the Image Size and Image Area settings but varies from a photo taken in still photography mode because of that 16:9 aspect ratio. Flash is disabled as well.
Also be aware that this picture-shooting feature depends on the setting selected for the Assign Shutter Button option, found in the Movie section of the Custom Setting menu. At the default setting, Take Photos, things work as just described. If you change the setting to Record Movies, you can use the shutter button to start and stop recording, but you can no longer take a still picture without shifting out of movie mode.


