With Interval Timer Shooting, you can set your Nikon D5300 to automatically release the shutter at intervals ranging from seconds to hours apart. This feature enables you to capture a subject as it changes over time — a technique commonly known as time-lapse photography — without having to stand around pressing the shutter button the whole time. Here's how to take advantage of this feature:
Set the Release mode to Single Frame or Quiet Shutter.
The fastest way to access the setting is to press the Release mode button on the front-left side of the camera.
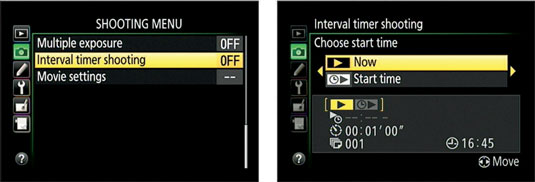
Display the Shooting menu, highlight Interval Timer Shooting.

Press OK.
To begin setting up your capture session, highlight Now or Start Time:
To start the captures right away, highlight Now.
To set a later start time, highlight Start Time.
Press the Multi Selector right to display the capture-setup screen.

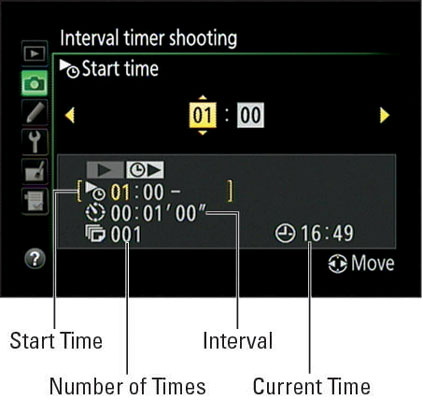
At the bottom of the screen, values appear for three available options: Start Time, Interval (time between shots), and Number of Times (total number of frames recorded). Note that if you selected Now in Step 3, the Start Time option is dimmed and the Interval option is highlighted instead.
Set up your recording session.
At the top of the screen, little value boxes appear. The highlighted box is the active option and relates to the setting that’s highlighted at the bottom of the screen. For example, the hour box for the Start Time setting is active. Press the Multi Selector right or left to cycle through the value boxes; to change the value in a box, press the Multi Selector up or down.
A few notes about these options:
The Interval and Start Time options are based on a 24-hour clock. The current time appears in the lower-right corner of the screen and is based on the date/time information you entered when setting up the camera.
In the Interval option, the left column box is for the hour setting; the middle, minutes; and the right, seconds. Make sure that the value you enter is for a longer time than the shutter speed you plan to use.
For the Start Time option, you can set only the hour and minute values. Again, the Start Time option is available only if you selected Start Time in Step 3.
After setting the capture options, press the Multi Selector.

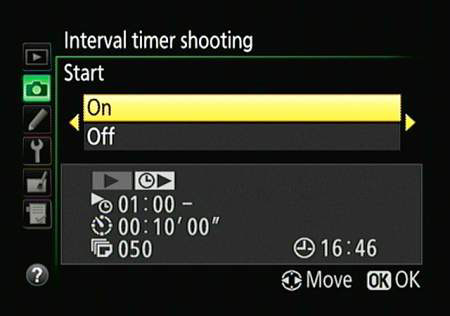
Only hold until the On and Off options appear on the screen.
Highlight On and press OK.
If you selected Now as the Start Time option in Step 3, the first shot is recorded about 3 seconds later. If you set a delayed start time, the camera displays the message Timer Active for a few seconds.
A few final factoids:
Interval Timer Shooting isn’t available for Live View photography or Effects exposure mode. The menu option is disabled any time Live View is enabled or the Mode dial is set to Effects.
The card access light blinks while Interval Timer Shooting is in progress. It’s the little light just above the Delete button on the back of the camera.
To interrupt Interval Timer Shooting, turn off the camera. Or move the Mode dial to a different setting.
You can’t adjust camera settings while the interval sequence is in progress. Make sure that everything is set up to your liking before you begin the interval-shooting session.
Autobracketing, high dynamic range (HDR), and multiple–exposure are disabled.
If you’re autofocusing, be sure that the camera can focus on your subject. The camera initiates focusing before each shot.
To prevent exposure miscues, cover the viewfinder. This prevents light from entering the viewfinder and fooling the exposure meter. Root around in your camera box for the viewfinder cover; then remove the viewfinder’s rubber eyepiece and install the cover in its place.
When the interval sequence is complete, the Interval Timer Shooting menu option is reset to Off. The card access light stops blinking shortly after the final image is recorded to the memory card.


