


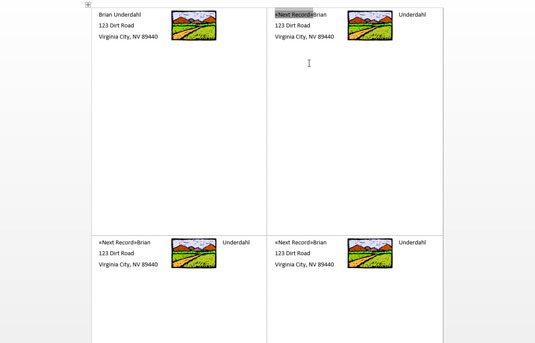
It's possible to add a graphical image to a mailing label in Word 2013. You can do it to a sheet of labels that are identical or when you’re merging names from an address list.
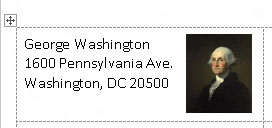
When you’re creating a sheet of identical labels, simply type and format the label that you want in the table's first cell, such as your own name and address to be used for return address labels.
After making your label, either from an address list's Merge fields or by typing plain text, you're ready to add the graphical image: Click the Insert tab and use the Picture button to insert the image.
Right-click the image and choose Wrap Text→Square. Resize the image and position it so that it's completely within the first cell in the table.
When everything looks just right, click the Update Labels button on the Mailings tab. This action populates the entire sheet, duplicating exactly what you placed in the first cell — including graphics.
Unfortunately, this graphical trick involves fooling Word's mail-merge function. And before you can save or print your document, you need to get rid of those > fields. Here's a suggestion:
Carefully select the text >, including the angle brackets on either side.
 >, including the angle brackets on either side.">
You have to select the whole thing; clicking only the field turns it gray. That’s not selecting! Drag the mouse over the entire thing to select it.
Press Ctrl+C.
This will copy the text.
Press Ctrl+H to conjure up the Find and Replace dialog box.
The Find and Replace Dialog Box will appear.
Click the mouse in the Find What box and then press Ctrl+V to paste.

This step pastes the text <<Next Record>> into the box.
Leave the Replace With box blank.
Click the Replace All button.

At this point, Word may replace only the selected text. That’s fine: Click the Yes button to continue replacing throughout the entire document.
Also click the Yes button if you‘re asked to continue searching at the beginning of the document.
Click OK when the search-and-replace operation has been completed.
Close the Find and Replace dialog box.
All those annoying <<Next Record>> chunks have disappeared from the labels.
Now your labels are ready to save and print.

