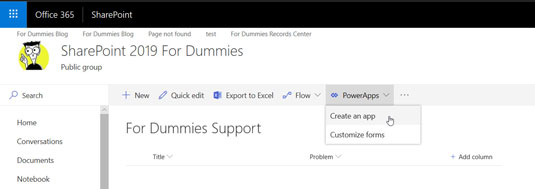
To build a PowerApp for working with a SharePoint list, open your web browser and navigate to the SharePoint list. This example uses an already-created For Dummies Support List-based app.
Click the PowerApps drop-down menu and select Create an App.

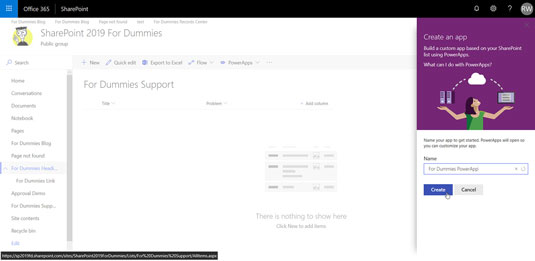
A dialog displays where you can enter a name for the app.
Enter a name and click Create.

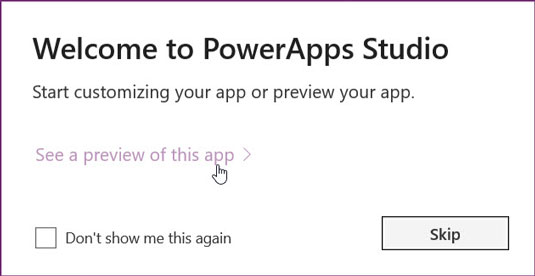
Your browser redirects you to the PowerApps development environment called PowerApps Studio.
PowerApps Studio might sound impressive, but it is really just a web page with a lot of functionality for building apps. All you need is your web browser to work with it and build PowerApps. Since we started with an existing SharePoint list, the heavy lifting of creating the PowerApp was already done for us.
Click the link to see a preview of the app.

When a new PowerApp is created from a SharePoint list we can preview it.
Click the play button, displayed in the top-right corner of the page, to display the app in a preview window. The preview shows you what the app will look like when viewed on a mobile phone.
The SharePoint list that contains the data for this app doesn’t have any items in it yet so let’s create one.
Click the plus (+) sign in the top-right corner of the screen.

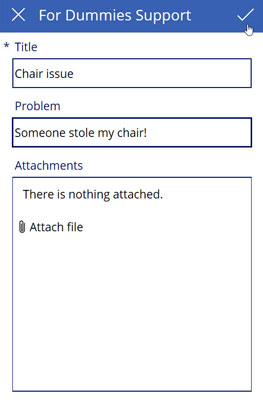
A form that represents the columns in the SharePoint list appears. Enter information into the form to create a new list item and then click the check mark in the upper-right corner of the app to create a new item, as shown.
A new list item will be added and the main app page will reload. Let’s head back over to our SharePoint list in our web browser to confirm the item was created.
Open the For Dummies Support list in our browser and confirm the new item has been created from the PowerApp.

Next, let’s create a new item in the SharePoint list in our web browser and then confirm it appears in the PowerApp.
Click the plus (+) sign to create a new item in the SharePoint list, then head over to the PowerApp preview and click the refresh icon (it looks like a circle).
Our new item is pulled into the PowerApp. We can now work with a SharePoint list from a PowerApp.
PowerApps can be integrated with Microsoft Flow. This combination lets you take SharePoint to the mobile world and also incorporate your workflow at the same time. In our view, this is a game changer in the technology world.
PowerApps Studio is a complex development environment. It will take some time to get a feel for customizing and creating new PowerApps. Remember to check out the Learn navigational link to see hands-on training guides and videos.


