All document-proofing options and settings are kept in one place, buried deep in Word 2013. Before you can make changes, you have to get to the proofing options. Here's how to get there:
Click the File tab.
Choose Options from the File tab’s menu.
In the Word Options window, choose Proofing from the left side.
The right side of the window contains options and settings for document proofing.
When you’re done working in the Word Options window, click the OK button to lock in whichever changes you’ve made.
How to change spell-check and grammar settings
After you find yourself in the Word Options window, in the Proofing corner, you can peruse and change the way Word reacts to your mangling of the planet’s number-one language. Here are some highlights:
To turn off on-the-fly spell checking, remove the check mark by the item Check Spelling As You Type.
To disable grammar checking, remove the check mark by the item Mark Grammar Errors As You Type.
Click the Settings button by the Writing Style drop-down list to customize and hone the grammatical disobedience that Word marks.
AutoCorrect options
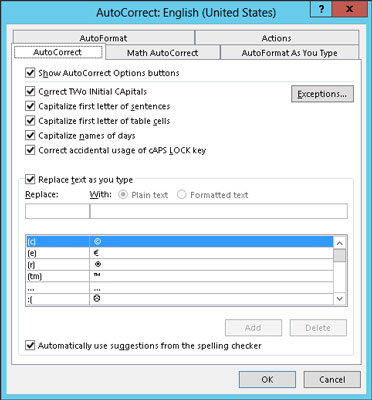
You can click the AutoCorrect Options button in the Word Options window to view the AutoCorrect dialog box and its slew of automatic word-correcting and typo-fixing options.

Here are some things you can do:
The AutoCorrect tab lists all problems that AutoCorrect fixes for you, plus common typo corrections. That’s also where you can remove the AutoCorrect entries you detest.
If you don’t like how Word changes web page addresses in your document into real hyperlinks, remove the check mark by the option Internet and Network Paths with Hyperlinks on the AutoFormat tab.
The AutoFormat tab also harbors those insidious options that automatically create bulleted lists and heading styles in Word; remove the appropriate check marks to disable those unwanted features.
Also refer to the AutoFormat As You Type tab to kill off additional automatic numbering and bulleted list features in Word.


