Creating a Contact group in Outlook 2013 is a simple matter of making up a name for your list and choosing from the collection of names you’ve stored on your system. A Contact group doesn’t keep track of phone numbers and mailing addresses, just e-mail addresses.
To create a Contact group in your Contacts module, follow these steps:
Click the New Contact Group button in the Home tab’s Ribbon (or press Ctrl+Shift+L).

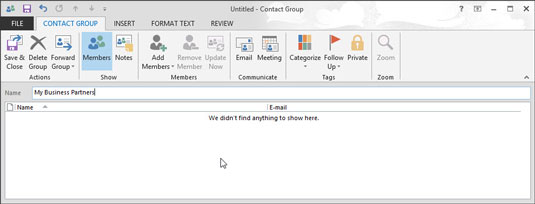
The Contact Group dialog box appears.
Type the name you want to assign to your Contact group.

The name you type appears in the Name text box.
Click the Add Members button and choose From Outlook Contacts.

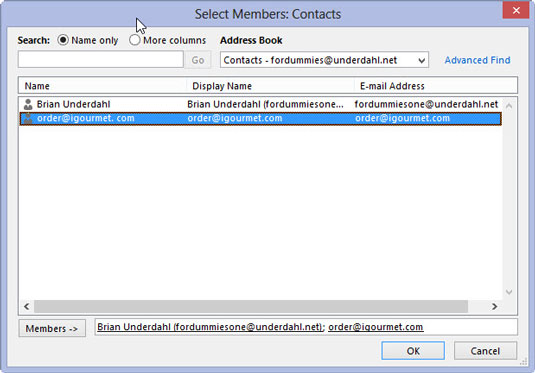
The Select Members: Contacts dialog box shows the available names on the left side and a blank Members box at the bottom.
To include the e-mail addresses of people who aren’t in your Contacts list or any of your other Outlook Address Books, Choose New Email Contact.

Enter the name and e-mail address of the person you want to add in the Add Members dialog box. Click OK.
Double-click the name of each person you want to add to your Contact group.

Each name you double-click appears in the Members box at the bottom of the dialog box.
When you’re done picking names, click the OK button.

The Select Members: Contacts dialog box closes.
Click the Save & Close button (or press Alt+S).

The Contact Group dialog box closes and your Contact group appears in boldface in your list of contacts.


