One of the best ways to communicate your presence on LinkedIn is to add your LinkedIn profile to your e-mail signature, if you've created one. Every time you send an e-mail, you can have text appear automatically at the end of your message similar to a written signature you would put at the end of a letter.
Some people just sign their name; others use this space as an opportunity to put their name and some contact information, such as phone numbers, e-mail addresses, physical addresses, and, more recently, website addresses. Some LinkedIn members include their profile URL, so anyone getting an e-mail from them can take a look at their personal profile and learn more about them.
LinkedIn developed a cool tool with which you can build your own advanced e-mail signature using the LinkedIn website. You can decide what information you want to include in your signature, and LinkedIn helps you with formatting and graphics — the entire “look and feel” of your signature.
Access the e-mail signature tool by clicking the Tools link at the bottom of the LinkedIn home page. When you get to the Tools page, skip down below the Outlook Connector section and look for the Email Signature section.
When you're ready to create your e-mail signature, just follow these steps:
Log in to LinkedIn, scroll to the bottom of the page, and click the Tools menu bar item.
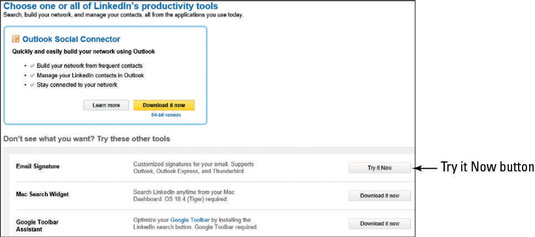
You should see the Email Signature tool.
On the Tools Overview page, scroll down to the Email Signature section and click the gray Try It Now button.
LinkedIn takes you to a special profile page: Create Email Signature.
On your profile page, click the drop-down arrow next to Select Layout to choose the layout option you want.
You have multiple options to select from. Some (such as Ingot or Plastic Curve) add a graphical look; the Simple option lists your information as text; and the Executive layout presents your information in a more professional manner.
Click around and pick a few layouts to see the automatic preview of that layout on your screen. This gives you an idea which layout and color scheme you like. You may want to revisit this step after you enter all your information so that you know how your finished signature will appear.
After you pick your layout style, enter the contact information you want to appear in your signature.
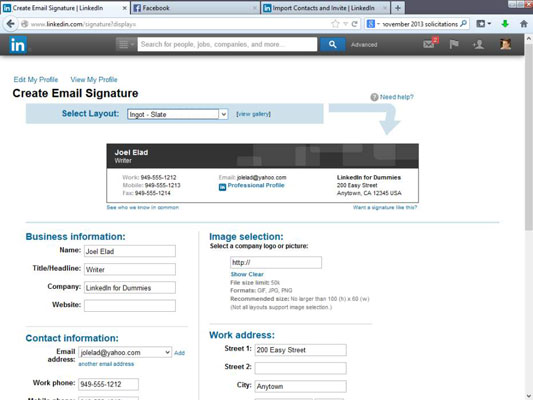
You can input as much or as little as you’d like, and that information will be reflected in your signature file.
Add a picture to your signature by entering the URL of that picture's location in the Image Selection field.
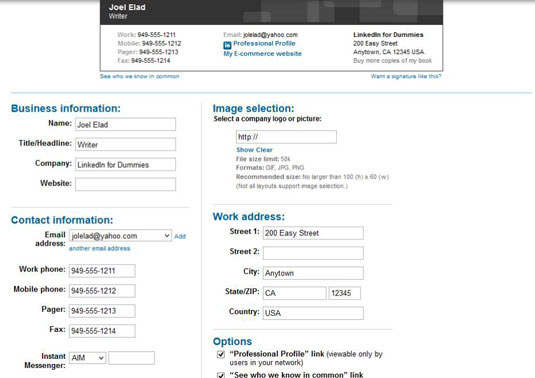
If you already uploaded a picture of yourself for your LinkedIn profile, you can include it here as well.
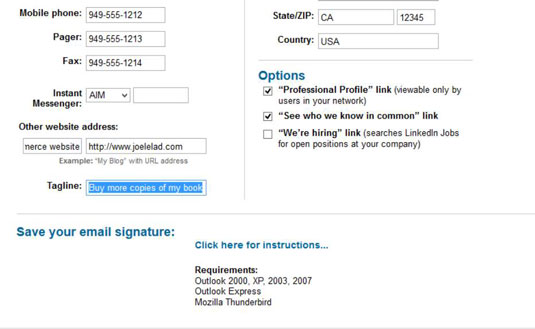
Scroll down to the Options section ( below Work Address) and decide which of three links can appear as part of your signature by selecting the appropriate check box(es):
Professional Profile: Creates a URL link to your LinkedIn profile page.
See Who we Know in Common: Creates a link to LinkedIn that, when clicked by a LinkedIn member, shows other LinkedIn members who are connected to you and that person.
We’re Hiring: Creates a link that takes someone back to LinkedIn and starts a Job Search query for job openings in the company you’ve listed in your LinkedIn profile.
You should consider enabling the Professional Profile option. The other two links are fine to enable as well, especially if you want to promote job listings at your own company.
Near the bottom of the page, click the Click Here for Instructions link under the Save Your Email Signature header to create and save your e-mail signature.
A pop-up window appears with your e-mail signature information. If you have a pop-up blocker on your web browser, you may want to deactivate it temporarily before performing this step, or be ready to temporarily allow pop-ups from LinkedIn.com.
When the page appears with the pop-up window containing the code of your e-mail signature, simply select all that text and then paste it into your favorite e-mail program, or you can scroll down and follow the instructions.
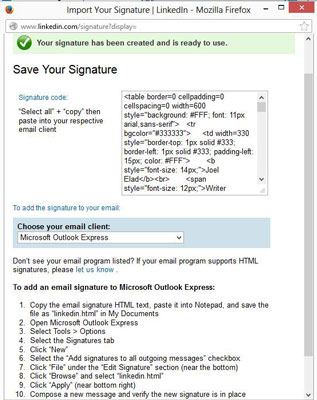
LinkedIn provides instructions for the most popular e-mail programs, such as Outlook and Yahoo! Mail. Click the drop-down arrow to bring up your e-mail program, and instructions appear at the bottom of the window.


