Using a custom editor designed for writing JavaScript code, like Komodo Edit, will save you a lot of time and effort. These Integrated Development Environments (IDEs) provide a text editor with special features that perform tasks such as highlighting keywords.
In most cases, the process for creating a new project is the same in any IDE you use. Komodo Edit is a free JavaScript editor you can use to write your application, as described in the following steps:
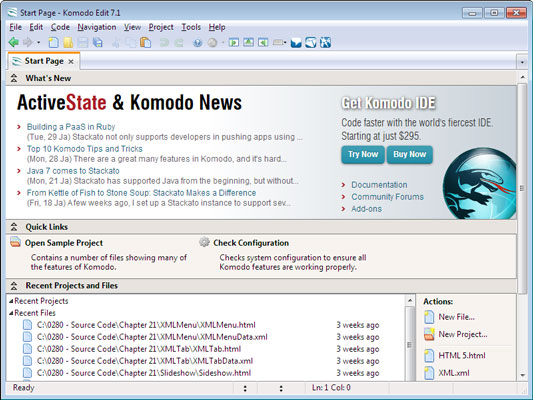
Open Komodo Edit.

You see the IDE. Most IDEs provide some type of Start tab. The Start tab can contain a number of items, but most include a list of your previous projects and any news about the IDE you’re using.
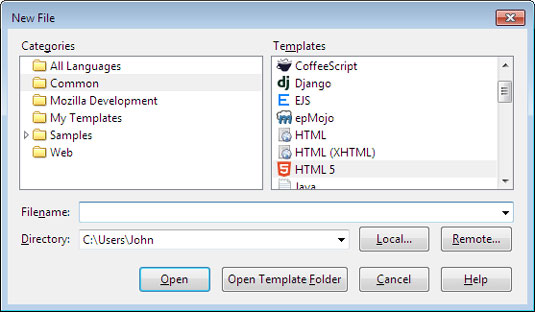
Choose File→New→File from Template.

You see the New File dialog box. IDEs usually provide some method for creating new files. This technique creates an individual file you can use to create the examples in the book. If you were working on a site that contained many files, you would create a project as a starting point instead.
Select Common in the Categories list and HTML5 in the Templates list.

Type a name for your file, such as MyTestPage.HTML. Choose a location to store the file in the Directory field (as required). Click Open.
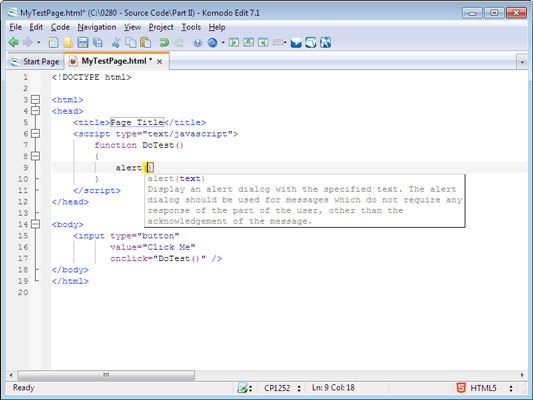
You see the new file opened. An IDE uses templates to start the file content for you. The amount of content the IDE provides depends on the template and the kind of file you create. An HTML5 template typically contains the declaration, heading, body, and title.
Create a control tag to display on screen.

For example, type <input type=”button” value=”Click Me” onclick=”DoTest()” /> to create a button control.
You see tag-specific help information provided by the IDE. An IDE typically displays helpful information about what to type next. These helpful tips make it easier to create useful code in less time and with fewer errors.
Type any code required to make the controls work. Save your work after each code addition.

You see function-specific help information provided by the IDE. As with the tags, the IDE also provides information about the code you type when it can. The code information is more detailed and usually contains descriptions of the functions you use.
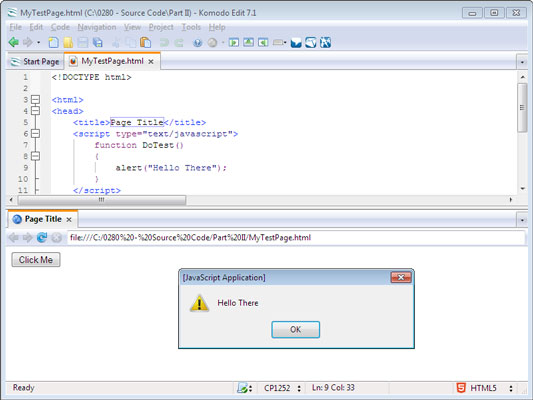
Choose View→Browser Preview. Choose Preview with This File when you see the Preview dialog box and click Preview.

You see a preview of your page as it will appear in the browser. An IDE will typically provide some means of viewing your work. You should use this view as a starting point. However, it’s important to view the work in the target browsers for your application as well.


