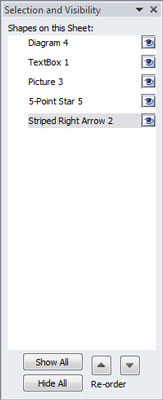
The Selection and Visibility task pane in Excel 2010 enables you to control whether various graphic objects in the worksheet are hidden or displayed. Hiding objects can make it easier to select other objects that are hidden or partially hidden behind them.
The way you open the Selection and Visibility task pane depends upon the type of graphic object you've selected in the worksheet:
Charts: On the Chart Tools Format tab, click the Selection Pane button in the Arrange group.
Text Boxes and Shapes: On the Drawing Tools Format tab, click the Selection Pane button in the Arrange group.
Clip Art and Pictures: On the Picture Tools Format tab, click the Selection Pane button in the Arrange group.
SmartArt: On the SmartArt Tools Format tab, click the Selection Pane button in the Arrange group.
After you open the Selection and Visibility task pane, you can temporarily hide any of the graphic objects listed by clicking its eye check box (to remove the eye icon). To remove the display of all the charts and graphics in the worksheet, click the Hide All button at the bottom of the Selection and Visibility task pane instead.

To redisplay a hidden graphic object, simply click its empty eye check box to put the eye icon back into it. To redisplay all graphic objects after hiding them all, click the Show All button at the bottom of the task pane.


