The most common type of graphical goober you stick into a Word 2013 document is a picture. Assuming that the image exists and you know where to find it on your computer, you can follow these steps to plop the image into your document:
Click the mouse wherever you want to place the image in your document, or at an approximate spot.

You can always move the image later; the job for now is to get the image into the document.
From the Insert tab’s Illustrations group, click the Pictures button.

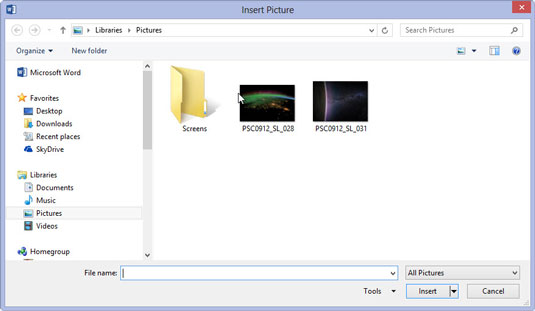
The Insert Picture dialog box appears.
Use the Insert Picture dialog box controls to browse for the image you want.

Your list of image options appears. It defaults to the Pictures library. Change the directory if your pictures are located somewhere else.
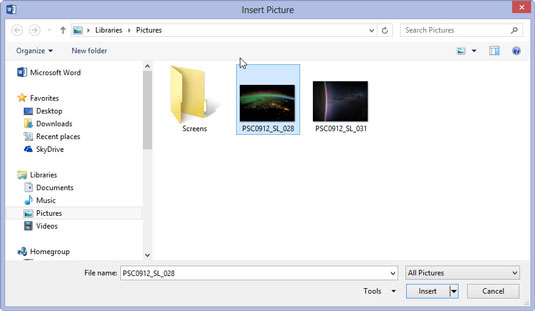
Click to select the image.

Choose your desired image.
Click the Insert button.

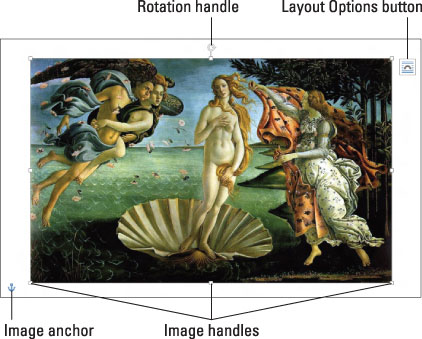
The image is slapped down into your document.
The controls are necessary because working with graphics in Word involves more steps than simply inserting pictures into a document.
After you insert a picture, or anytime an image is selected, the Picture Tools Format tab appears on the Ribbon.


