Rotating in 2D
To perform rotation in two dimensions in SwiftUI, use therotationEffect() modifier. The following code snippet displays a “wheel of fortune” image on the screen, together with a Button view:
struct ContentView: View {
    @State private var degrees = 0.0    var body: some View {
        VStack{
            Image("wheel")
             .resizable()
             .frame(width: 400.0, height: 400.0)
             .rotationEffect(.degrees(degrees))            Button("Spin") {
                let d = Double.random(in: 720...7200)
                withAnimation () {
                    self.degrees += d
                }
            }
        }
    }
}
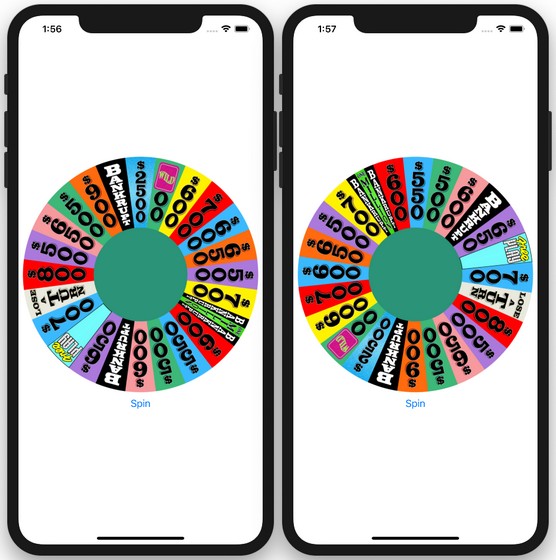
When the button is tapped, a random number between 720 and 7,200 is generated and assigned to the degrees state variable. This state variable is bound to the rotationEffect() modifier, so when the button is tapped, the image will rotate. To rotate the image one complete turn takes 360 degrees. So, when you generate a value from 720 to 7,200, you’re essentially making the image turn from 2 to 20 complete turns. The image on the left shows the image before rotation. The image on the right shows the image rotated using the random number generator. Spinning the wheel of fortune.
Image of wheel by MarioGS used under a Creative Commons Attribution–Share Alike 3.0 Unported license
For this example, you really need to try it out to see the effects of the rotation.
If you try this code snippet, you’ll find that the animation is very abrupt — it starts and ends with the same speed. A more natural way of spinning could be achieve using theeaseInOut() modifier:
    var body: some View {
        VStack{
            Image("wheel")
             .resizable()
             .frame(width: 400.0, height: 400.0)
             .rotationEffect(.degrees(degrees))            Button("Spin") {
                let d = Double.random(in: 720...7200)
                let baseAnimation =
                    Animation.easeInOut(duration: d / 360)
                withAnimation (baseAnimation) {
                    self.degrees += d
                }
            }
        }
    }
In the preceding addition, you use the easeInOut() modifier to perform the animation based on the number of complete rotations you need to perform (each turn is allocated 1 second). When the wheel is rotated now, it’s more realistic, and at the same time each spin of the wheel takes a random amount of times to complete (more spins take more time).
Rotating in 3D
In addition to performing animations in 2D, you can also perform 3D animations using therotation3DEffect() modifier. To understand how this modifier works, it’s best to look at an example:
struct ContentView: View {
    var body: some View {
        Text("SwiftUI for Dummies")
            .font(.largeTitle)
    }
}
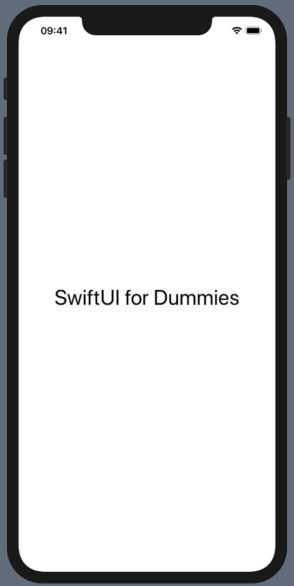
The preceding code shows a Text view displayed in large title format. Displaying a Text view.
Let’s now apply a rotation3DEffect() modifier to the Text view:
struct ContentView: View {
    @State private var degrees = 45.0    var body: some View {
        Text("SwiftUI for Dummies")
            .font(.largeTitle)
            .rotation3DEffect(.degrees(degrees),
                axis: (x: 1, y: 0, z: 0))
    }
}
In the preceding addition, you converted the value of the degrees state variable using the degrees() function (which returns an Angle struct), pass the result to the rotation3DEffect() modifier, and specify the axis to apply the rotation to. In this example, you specified the x-axis to apply the rotation. The result of this rotation is shown below. Applying the 3D rotation to the x-axis (45 degrees).
If you change the degrees to 75, then the result would look like the following image.
@State private var degrees = <strong>75.0</strong>
 Applying the 3D rotation to the x-axis (75 degrees).
Now change the axis to y and the result is as shown below:
struct ContentView: View {
    @State private var degrees = 75.0
    var body: some View {
        Text("SwiftUI for Dummies")
            .font(.largeTitle)
            .rotation3DEffect(.degrees(degrees),
                axis: (x: 0, y: 1, z: 0))
    }
}
 Applying the 3D rotation to the y-axis.
How about z-axis? The following image shows the output:
struct ContentView: View {
    @State private var degrees = 45.0
    var body: some View {
        Text("SwiftUI for Dummies")
            .font(.largeTitle)
            .rotation3DEffect(.degrees(degrees),
                axis: (x: 0, y: 0, z: 1))
    }
}
 Applying the 3D rotation to the z-axis
Finally, how about all the three axes? The image you see below shows the output:
struct ContentView: View {
    @State private var degrees = 45.0
    var body: some View {
        Text("SwiftUI for Dummies")
            .font(.largeTitle)
            .rotation3DEffect(.degrees(degrees),
                axis: (x: 1, y: 1, z: 1))
    }
}
 Applying the 3D rotation to the three axes.
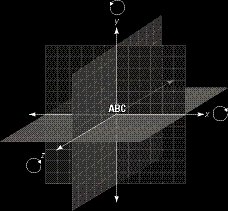
By now, you should have a pretty good grasp of how the rotation is applied to the three axes. The next image shows a summary of the rotation made to the three axes:
 Applying the 3D rotation to a view on the three axes.
Now apply some 3D animation to the rotation:
struct ContentView: View {
    @State private var degrees = 0.0
    var body: some View {
        Text("SwiftUI for Dummies")
            .font(.largeTitle)
            .rotation3DEffect(.degrees(degrees),
                axis: (x: 1, y: 1, z: 1))
            .onAppear() {
                let baseAnimation =
                    Animation.easeInOut(duration: 3)
                withAnimation (baseAnimation) {
                    self.degrees += 360
            }
        }
    }
}
Now you’re able to see the text rotate in 3D.Want to learn more? Check out these SwiftUI resources.


