 The Samsung Pay and the Android Pay logos.
It is easy to confuse Samsung Pay and Google Pay. These are two different applications. Google Pay is nice, but it does not have the Magnetic Secure Transmission capability that allows you to use mobile payments at many more retailers.
The app page description is shown here. When you tap Install, you get the image on the right.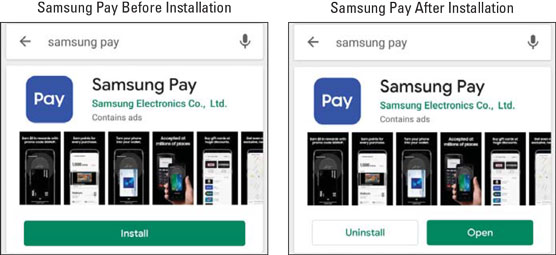 The Samsung Pay app Play Store images before and after installation.
The Samsung Pay app works a little different than most other apps. The first time you open Samsung Pay, you will be given information on how to use it and be asked to put in your credit card information (in a very convenient way, by the way) and asked all kinds of permissions and agreements.
Once you have given all this information, Samsung Pay waits patiently at the bottom of your home pages, ready to meet your payment needs with nothing more than a quick swipe from the bottom of the screen. Most people would simply not use this app if they had to go digging through their screens to find the app. This way, you do not have to search to find the app and wait for it to come up.
This figure shows the Home screen with the Samsung Pay launch button sitting at the bottom ready to appear with a quick flick.
 The Samsung Pay quick launch button.
The launch button is also there on the Lock screen, so you don’t even need to unlock your phone because you’ll be using the exact same security steps before you can use your credit card.
How to set up Samsung Pay
When you open the Samsung Pay app, you’re greeted with a series of pages before you get to the Home screen seen in the following figure. These pages include marketing introductions (which you don’t need because you read this article), permissions and agreements (which you should give if you want to move forward), and some pages that verify that Samsung Pay can work on your phone. The Samsung Pay Home Page.
The app wants to make sure that your phone has the right parts (your Galaxy S20 does, but that is not the case for every Android phone) and that you are in one of the 27 countries where Samsung Pay is accepted. You’re set if you’re in the United States, Canada, China, or Kazakhstan (very nice!). You’re out of luck if you’re in, say, Yemen. Being in these countries is important for this app because each country has its own set of laws for payments, and Samsung may not have all the arrangements in place if you are not in one of these countries. New countries will be added as quickly as possible.
Read the agreements. In all likelihood, they are the same kind of agreements that exist in the fine print in your existing credit card and every time you sign your name to a credit card charge slip that affirms you won’t pull any shenanigans. That said, I am your humble author, not your legal advisor, and you should feel comfortable with these agreements.
The next part of the initial setup process is to step through how you want to set up security. You have two security options when you are making a transaction: using your fingerprint or entering a PIN.There are a few scenarios where using a Samsung Pay PIN rather than a fingerprint might make sense. In most cases, using your fingerprint is exceptionally convenient. If you haven’t set these up yet, the Samsung Pay application will walk you through the steps to do so. It’s quick and easy.
The next step is to enter your credit card information. When you tap the link that says Cards on the home page or the menu, you’re taken to a screen that shows you the images of the credit cards you’ve added. Initially, the screen will be empty. This figure shows what it looks like after you have entered your first card.
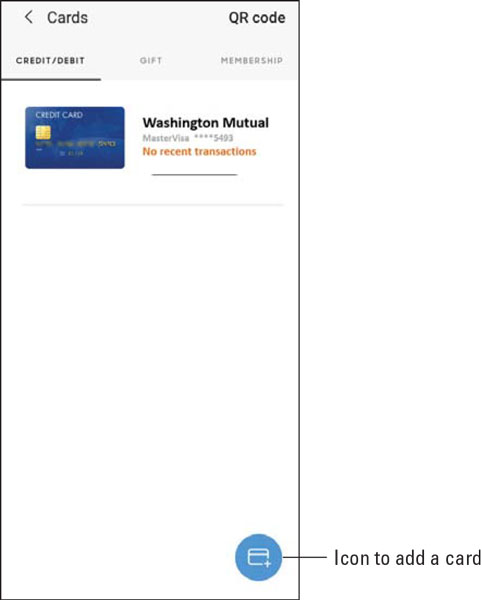 The Samsung Pay Card page.
To add a new card, tap the blue circle in the lower-right corner with a silhouette of a credit card and a plus sign. You get a pop-up with some choices. Pick the Add Credit/Debit Card option to start this process. The left image in the following figure is when the screen first comes up and the right image is when you have the desired credit card in the viewfinder.
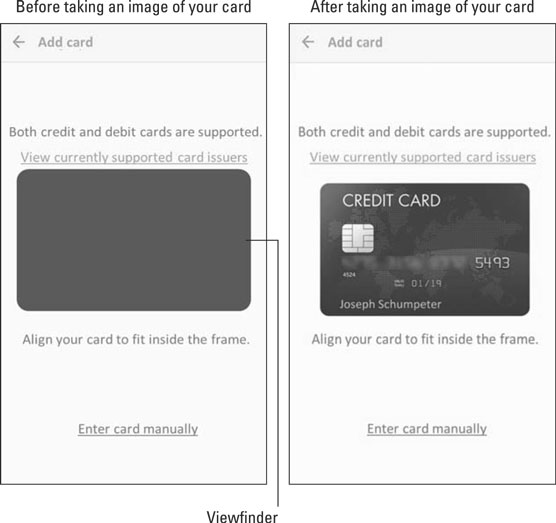 The Samsung Pay credit card image processing screen.
The app then interprets the information on the front of your credit card and populates as many screens as possible with your credit card information. It will ask you to fill out the form seen in the following figure if it can’t figure out the information on your card or the information is on the reverse side of the card.
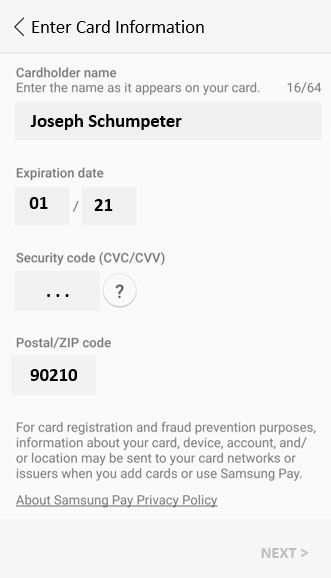 The Populated credit card data fields.
Not every company that offers credit cards is signed up with Samsung Pay. You can check the Samsung website or tap the link to check before you proceed. Otherwise, just go ahead and see whether things go through.
Tap Next, and Samsung Pay will seek to confirm things with your credit card company. This does not cost you anything. It just wants to make sure that when you do make a charge, everything will flow smoothly. One of the things the company will want to verify is that you are authorized to use that credit card. This means that either you need to be the primary cardholder or you need to coordinate with that person.Keep in mind that scanning your fingerprint and tapping your phone on a credit card reader has the same legal implications as actually signing a credit slip.
When the credit card company verifies that everything is on the up and up, you get an acknowledgement like the one shown.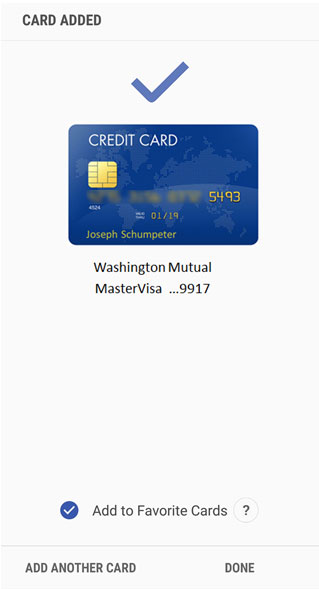 Card added verification screen.
How to use Samsung Pay
First, pick something to buy at a store. Have a clerk ring it up and tell him you will pay with a credit card. Swipe the screen upward. You see the screen seen shown here.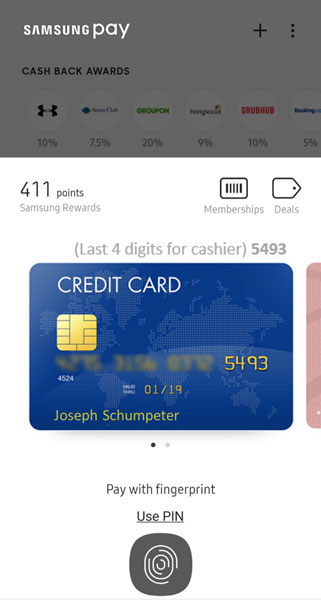 Samsung Pay payment screen before reading your fingerprint.
Enter your fingerprint by pressing the icon and you see a screen similar to this one.
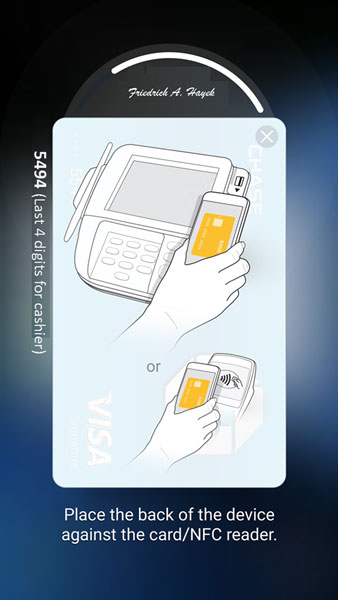 Samsung Pay payment screen after reading fingerprint.
You should either hold your phone against where the credit card reader would read the magnetic stripe or where there is the contactless payment system logo if it is available.
The semicircle above your signature will start counting down, and your phone will vibrate to let you know that it is transmitting. You will hear a beep if it all goes through. If it fails for some reason, you can try again simply by reentering your security option.
This process works with the vast majority of credit card readers. This does not work well, however, with credit card readers where you insert your card into the machine and pull it out quickly. This type of reader is mostly used on gasoline pumps. Sorry.


