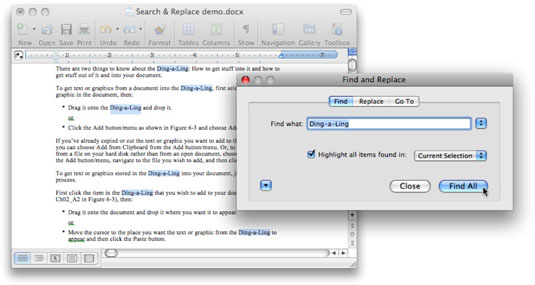
In Word 2008 for Mac, you’re not limited to making word replacements when you use Find and Replace. You can make formatting changes as well, saving you time. For example, if you want to search for a certain word and make it appear in bold and italic text, you can easily do one search to make the change throughout the document.
Here’s how to use Find and Replace to make global formatting changes in a document:
Choose Edit→Find.

Optionally, press the Command key + F. The Find and Replace dialog appears.
Type the word you want to replace in the Find What field. Click the Highlight All Items check box to locate all the occurrences of the word or phrase you’re searching for in the document.
If you don’t click the Highlight All Items check box, Word will find each occurrence of the word one at a time. Because you want to change them all, you want to highlight them all.
Click the Find All button and then close the Find and Replace dialog.
All occurrences of the word are now selected.
Choose Format→Font and choose the formatting you want from the Font Style list. Click OK.
Every occurrence of the word in the document now appears with the formatting you selected.


