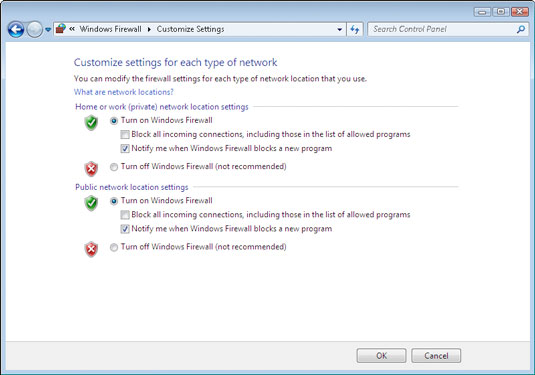
Here are the steps to activate the firewall in Windows:
1. Choose Start→ Control Panel.
In the Control Panel, click System and Security.
2. On the System and Security page, click Windows Firewall.
3. On the Windows Firewall page, click Turn Windows Firewall On or Off.
The page shown in the figure appears.
 Activating the firewall.
4. Select the Turn On Windows Firewall radio button.
Note that there are two such buttons: one for home and work (private) networks and one for public networks. If you have a separate router for your work or home network, you can leave the home and work (private) network firewall turned off. But always turn on the firewall for public networks.
5. Click OK.
The firewall is enabled.
Do not enable Windows Firewall if you’re using a separate firewall router to protect your network. Because the other computers on the network are connected directly to the router and not to your computer, Windows Firewall won’t protect the rest of the network. Additionally, as an unwanted side effect, the rest of the network will lose the ability to access your computer.
Windows Firewall is turned on by default. If your computer is already behind a firewall, you should disable Windows Firewall. (In some cases, the network’s group policy settings may prevent you from disabling Windows Firewall. In that case, you must change the group policy so that Windows Firewall can be disabled.)


