

Windows comes with a file compression feature. It's not the same as creating a Zip file archive. This type of compression is on the fly: When you open the compressed file, it's decompressed to its original size. So, as a user, you don't notice the compression in any way other than that your files consume less storage space.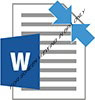
To compress a single file, heed these directions:
- Right‐click the file or folder icon to compress. When you compress a folder, you compress all files and folders held in that folder. It's a simple way to compress a slew of files all at once.
- Choose Properties from the shortcut menu.
- On the General tab of the Properties dialog box, click the Advanced button. The Advanced Attributes dialog box appears.
- Place a check mark by the option Compress Contents to Save Disk Space.
- Click OK to close the Advantage Attributes dialog box. Nothing happens yet.
- Click OK again to dismiss the Properties dialog box. If you're compressing a folder, you see a further confirmation, asking whether you want to compress only the folder or all its files and contents.
- For folders, choose the default option: Apply Changes to This Folder, Subfolders and Files. Click OK. The file or folder is compressed.
Compressed files and folders are superimposed with blue pinchy arrows, as shown here. That's your only visual clue that a file is compressed. Otherwise, you can interact with the file as you always have. Windows handles the decompression for you.
To remove compression from a file or folder, repeat the steps here, but in Step 4 remove the check mark by the item Compress Contents to Save Disk Space.
- This type of file compression works well for files you plan to keep around, but for files you don't need often, consider copying them to another media.
- Single‐file compression offered by Windows is on the fly, which is faster than extracting files from a Zip archive.


