OneDrive from Microsoft is all about storing files and sharing them between your laptop and the cloud. In Windows 10, OneDrive storage folders in File Explorer on your laptop work together with the online version of OneDrive. (Sign in to onedrive.live.com with your Microsoft account to work with your online OneDrive.)
Any files you move or copy into a OneDrive folder in File Explorer automatically sync (or back up) to your OneDrive storage in the cloud, and vice versa. Any folder you create in OneDrive in File Explorer also magically appears in your cloud OneDrive.
The first time you sign in to Windows, you might have noticed a Welcome to OneDrive window. Clicking the Get Started button accepts the terms of the service agreements and privacy statements that are required to use OneDrive.
The next window that appears prompts you to confirm the default OneDrive folders on your laptop. Click Next, and then click Next again to accept the default setting of syncing all your OneDrive folders. Then click Done to close the window and begin using OneDrive. If you are prompted to enter an administrator password, type it and then click Yes.
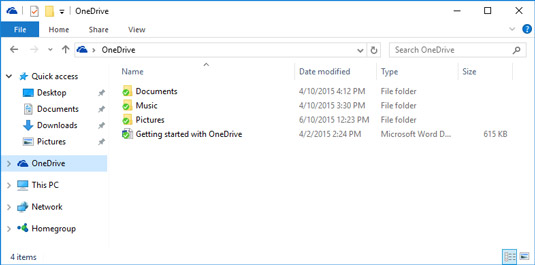
After all that, File Explorer opens and shows you your OneDrive folders. These are Documents, Music, and Pictures by default. Click OneDrive in the Navigation pane to see these folders any time.
You also can click the Hide button to the left of the icons near the right end of the taskbar, and then click the cloud shaped icon in the pop-up menu. Click Open your OneDrive Folder. Then just use your favorite technique to move or copy files into one of the folders (for example, click and drag or select a file and copy and paste it). From there, Windows uploads your files automatically.


