If you have decided to include a sound file for download on your Web site, you don’t have to settle for sound files that are already out there. You can create your own MP3 file. It’s very satisfying to create and deliver your own MP3 file.
This example uses a voice file, because that’s the easiest to create for the most people and more often useful in a typical, rather than a specialist music, Web site.
MP3 is so good with music that it’s a bit of overkill for voice files, which can be encoded and played back with less-powerful compression algorithms. But so many people have set their systems up to play MP3 files these days — on their PCs and on music players such as the Apple iPod — that you may as well go with the flow.
If you have a Mac, it includes well-regarded built-in software to accomplish these tasks called iLife; please refer to the iLife documentation for steps. Follow these steps to create an MP3 file under Windows:
Find the built-in microphone, if your system has one, or attach a microphone to your computer.
It’s good if you have a built-in microphone or one lying around. If not, try to determine the size of the microphone opening on your PC, or take your PC with you to the shop so you can be sure of getting a fit. Or, if you have an unused USB connector, consider buying a USB microphone, which are well-regarded and are certain to fit.
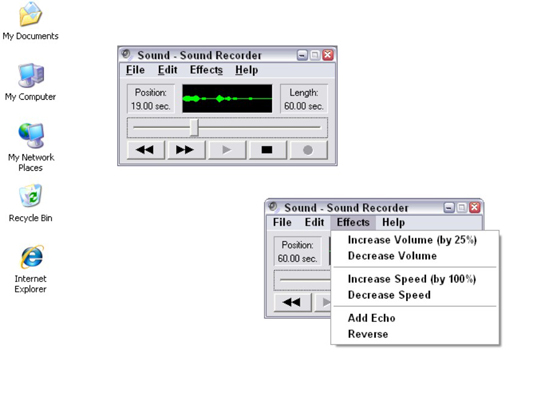
Open Windows Sound Recorder by choosing Start→Programs→Accessories→Entertainment→Sound Recorder.

The Sound Recorder application window is very small and can’t be resized. However, it includes a lot of capability; you can make sounds louder, quieter, faster, and slower, for instance.
Record your message. Click the red Record button, wait three seconds, and speak. When you’re finished speaking, wait three seconds and click Stop.
The sound is recorded. The three seconds of blank tape at the beginning and end give you room to play with in editing and prevent the recording from seeming to start or stop too abruptly.
Click Play to hear your message. Choose File→New and then return to Step 3 to re-record if necessary.
When you’re happy with your message, go to the next step.
Save the file as a WAV file.
This is the only file format supported by Sound Recorder — no tricky choices to make here.
Convert the file to MP3.
If you don’t have a converter program on your PC, look for a program of this type on CNET’s download.com.
Double-click the MP3 file to test it.
It will play back in Windows Media Player, QuickTime, or another media player you have on your computer.


