Though you’re undoubtedly very excited about publishing your website, you have one more task to perform beforehand: Set up a test directory where you can upload your site to the hosting server for one final round of quick testing.
A test directory is a folder you create that sits at the root level of the remote server. By uploading a copy of all the site files from your local computer to this remote test folder, you can review the remote files on the Internet, as though they are “live,” for the final round of testing.
This keeps the customized placeholder page (index.html) intact and visible to any potential visitors to the domain until you’re ready to publish the site.

To create a test directory on your remote server, follow these steps:
Launch your FTP client and establish a connection with the remote server.
Though each FTP client is slightly different, they all should allow you to establish a connection by selecting the desired session profile and clicking an OK or Connect button.
Create a new test directory with the name of your choice at the root level on the remote site.
You should see an option somewhere in the FTP interface to make a new directory (often called MkDir) or create a new folder using the File→New Folder command.
Your test directory folder can be named anything you like, such as test, temp, dev (for development), secret, lab, check, wip (for work in progress), or trial. Alternatively, you could name the test directory after the abbreviation of the client’s site, such as MBD for Monkey Bars Design.
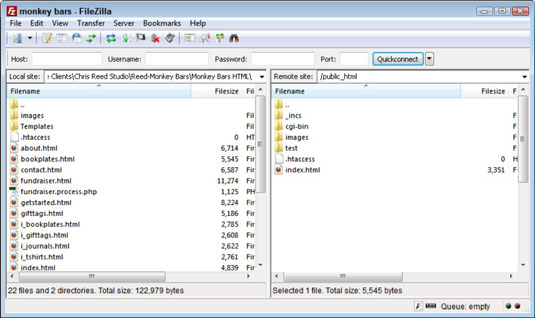
When you create your test directory, you may notice that the host server already contains some files and folders. Most host providers display default home pages (usually called index.html or default.htm) that are used as placeholders for your domain until you’re ready to publish your site. When those pages include graphics, you’ll also likely see an images folder at the root level of the host server for your domain.
If you have already designed and uploaded your own customized placeholder page to the server, you can see that file on the remote server too.
In addition to a default home page, many host accounts include a cgi-bin folder, inside which you can place script files to handle form processing and other programming.
Anything else that you see there is probably required by the host provider for your site to be fully functional, so be sure to leave those files where they are. Creating a test directory should not affect those files, as long as you leave your customized placeholder page named index.html and the images folder in place at the root level until the fully tested site is ready for publishing.
Now that you have your test folder in position on the remote server, you are ready to discover the file transfer process, final-round testing, and publishing.


