You can use a variety of input field types in your forms, such as text, password, radio (button), checkbox, hidden, search, tel (telephone number), url, email (address), datetime, date, month, week, time, datetime-local, number, range (sets a range of numeric values), color, and more.
Not all fields require values for name and type attributes (for example, text box or password fields), but it’s a good idea to provide users with explanatory labels and examples of input data any time they might have questions about formats — such as when pondering whether to include dashes or spaces in credit card numbers.
Check boxes and radio buttons, on the other hand, require such information so they can be properly labeled when the browser shows users what selections are available.
For input elements that require a user to select an option (a check box or radio button) rather than typing something into a field, you define both the name and the value. When the user selects a check box or a radio button and then clicks Submit, the form returns the name and value assigned to the element.
Text fields are single-line fields into which users type information. When you need to offer the user the opportunity to fill in more than one line, you use a text box.
Here’s how to create a single-line text field:
Define the input type as a text field by using the element with the type attribute set to text.
<input type="text">
Then use the name attribute to give the input field a name.
<input type="text" name="firstname">
The user supplies the value when she types in the field.
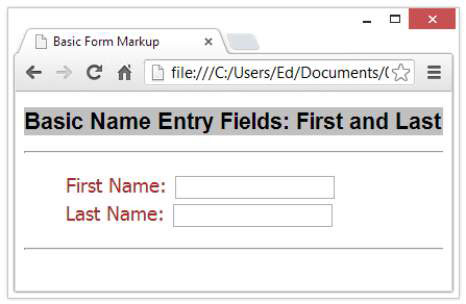
The following markup creates two text input fields, one for a first name and one for a last name:
<form action="bin/guestbook.php" method="post">
<ul style="list-style-type: none;">
  <li>First Name: <input type="text" name="firstname"></li>
  <li>Last Name: <input type="text" name="lastname"></li>
</ul>
</form>
In addition to the elements, this markup includes list ( and ) elements and some text to label each input field. By themselves, most form elements don’t give many clues about the type of information you want them to enter.
You must use HTML block and inline elements to format the appearance of your form and also to supply the necessary text. The figure shows how a browser displays this kind of HTML.

You can control the size of a text field with these attributes:
size: The length (in characters) of the text field
maxlength: The maximum number of characters the user can type into the field
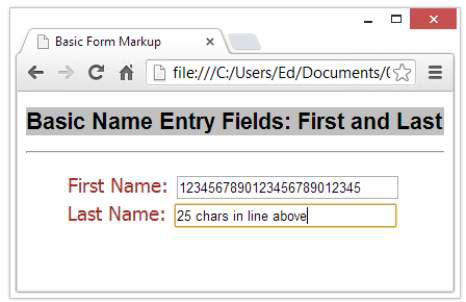
The following markup creates a form that sets both fields to a size of 30 (characters long) and a maxlength of 25 (characters long). Even though each field will be about 30 characters long, a user can type only 25 characters into each field, as shown in the figure.
(Setting the size attribute greater than maxlength ensures that the text field will always have some white space between the user input and the end of the field box on display; you don’t have to do this yourself, but it is visually pleasing.)

<form action="bin/guestbook.php" method="post">
<ul style="list-style-type: none;">
  <li>First Name: <input type="text" name="firstname" size="30"
      maxlength="25"></li>
  <li>Last Name: <input type="text" name="lastname" size="30"
      maxlength="25"></li>
</ul>
</form>


