By using JavaScript, you can change any part of an HTML document in response to input from the person browsing the page. Before you get started, take a look at a couple of concepts. The first is a method called getElementById.
A method is an action that's done to or by an object in a JavaScript program.
Fetching elements with getElementById
getElementById is probably the easiest and most commonly used way for JavaScript programmers to work directly with HTML. Its purpose is to locate an individual element in a document so that you can change it, delete it, or add something to it.
Another word for locating an element is selecting an element.
To use getElementById, first make sure that the element you want to select has an id attribute. Then just use the following formula to locate that element:
document.getElementById("id‐value")
For example, to select an element with an id value of myName, you can use this code:
document.getElementById("myName")
Getting what's inside an element with innerHTML
When you have an element, the next logical thing to do is to make a change to it.
innerHTML is a property of every element. It tells you what's between the starting and ending tags of the element, and it also lets you set the contents of the element.
A property describes an aspect of an object. It's something that an object has as opposed to something that an object does.
For example, say that you have an element like the following:
<p id="myParagraph">This is <em>my</em> paragraph.</p>
You can select the paragraph and then change the value of its innerHTML with the following command:
document.getElementById("myParagraph").innerHTML = "This is <em>your</em> paragraph!";
Trying it out: Changing a list
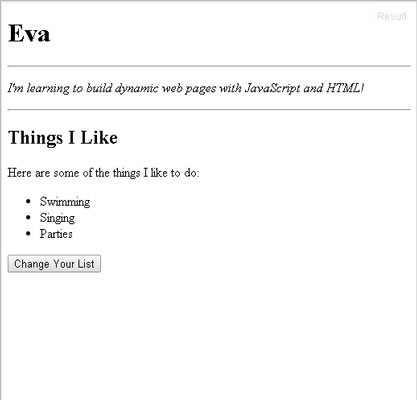
Now that you know a little about getElementById and innerHTML, take a look at an HTML home page. You'll add a button and JavaScript code to your home page to let you change your list of favorite things with the click of a button.
Add a button below the list with the following HTML:
<button id="changeList" type="button">
  Change Your List
</button>
The button element causes the browser to create a button in your browser window with the label of the button set to the text between the starting and ending tags.
Create three new variables in the JavaScript pane.
var item1;
var item2;
var item3;
These three variables will be used to hold the values input by the user before they get written to the web page.
Make JavaScript pay attention to clicks on the button by adding this to the JavaScript pane in JSFiddle:
document.getElementById("changeList").onclick = newList;Use a method called getElementById to locate the element in the document that has an id attribute set to changeList. As you know, this is the id value of the button.
When JavaScript has found the button, use the onclick event handler to tell it to watch for clicks on that button. An event handler is exactly what it sounds like. It tells JavaScript how to handle different types of events that happen in the browser. In this case, mouse clicks.
If the event handler detects a click on the button, tell it to run the function that you've called newList. A function is like a program within a program. Functions don't run until you tell them to by "calling" them.
Type these lines to ask the user for new list items:
function newList(){
  item1 = prompt("Enter a new first thing: ");
  item2 = prompt("Enter a new second thing: ");
  item3 = prompt("Enter a new third thing: ");
  updateList();
}
The first line of this block of code is what makes it a function. It tells JavaScript not to run the code between { and } until the function is called (using its name, newList).
Inside the function, gather three new list items from the user, using the prompt command.
Finally, tell JavaScript to run the function called updateList, which you'll write in the next step.
Tell JavaScript to update the three list items.
function updateList() {
  document.getElementById("firstThing").innerHTML = item1;
  document.getElementById("secondThing").innerHTML = item2;
  document.getElementById("thirdThing").innerHTML = item3;
}
The updateList function finds each of the list items using their id attribute values. It then uses a method called innerHTML to change the value that's between the starting and ending tags of the list item to the values that the user entered into the prompt.
After the updateList function gets run, the values of the three list items should change to the new values entered by the user.
When you're finished, your code in the JavaScript pane should match the following code. Check it very carefully before moving on to make sure you don't have any syntax errors.
var item1;
var item2;
var item3;
document.getElementById("changeList").onclick = newList;
function newList() {
    item1 = prompt("Enter a new first thing: ");
    item2 = prompt("Enter a new second thing: ");
    item3 = prompt("Enter a new third thing: ");
    updateList();
}
function updateList() {
    document.getElementById("firstThing").innerHTML = item1;
    document.getElementById("secondThing").innerHTML = item2;
    document.getElementById("thirdThing").innerHTML = item3;
}
Click Run to try out your new program.
If you did everything correctly, you should now be able to click the button, enter new text into each of the three prompt windows, and then see the new items instead of the three original list items, as shown here.


