Before you record a video, you should know your audience: People younger than 35 prefer 10-second videos, and people 35 and older prefer 30-second spots.
Filming with a smartphone or tablet
When you’re ready to start recording a video on your iPhone, iPad, Android smartphone, or Android tablet, open the Instagram app (if it’s not open already) and then tap the + icon at the bottom of the home screen. In the Library or Photo screen that appears, tap Video.The Instagram apps on the iPhone, iPad, Android smartphones, and Android tablets all work the same.
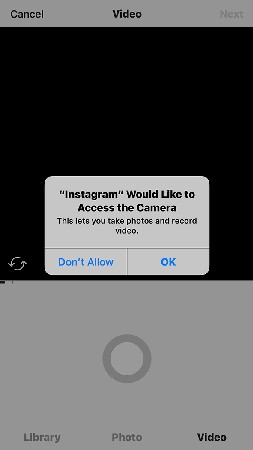
The first time you open the Video screen, a pop-up window appears. Instagram wants to access the microphone on your smartphone so it can record videos with sound. Access the microphone by tapping OK. If you want to record silent videos, tap Don’t Allow.
The next time you open the Video screen, you won’t see this pop-up window. If you want to turn your microphone off and on in Instagram, access your smartphone’s settings, open the Instagram settings entry, and then turn the microphone on or off.
The Video screen has the following elements:- The viewer, which is in the upper part of the screen, displays what your smartphone sees through its camera lens.
- The switch cameras icon is in the lower-left corner of the viewer. Tap this icon to switch between the front and back cameras.
- The recording bar is one of two bars just below the viewer and on the left. The recording bar represents how long you’ve been recording. When the recording bar is blinking, you can start recording either at the beginning of a video or after a video clip.
- The 3-second recording time bar indicates when the video is 3 seconds long. When the recording bar passes the 3-second spot, you can save your video.
- The record button is the large gray circle in the bottom half of the screen.
If you record for only one or two seconds, the recording bar is solid for the time you recorded. Between the recording bar and the minimum bar, you’ll see a blinking recording bar. That blinking bar tells you how many more seconds you have to meet the minimum recording time to save your video.
Recording multiple video clips
To save time, you can record multiple clips in one recording. For example, suppose you're recording a video of your new restaurant. After filming the inside of the restaurant, you don’t want to spend precious video time recording your move to the outside to show the exterior of the building.After you record your first clip, release your finger. When you’re ready to start recording again, tap and hold down on the record button again. You may repeat this process as many times as you want within the 60-second limit for a video. The timer above the record button continues from the time you paused the recording.
The recording bar places a white line between each clip. In this way, you can see how many clips you have.
Deleting video clips
If you decide that you want to delete the last video clip you recorded, tap Delete at the bottom of the screen. The color of the Delete button and the recording bar changes to red. Then tap Delete again. The Delete option disappears and the blinking recording bar appears so you can record a new video clip.If you want to delete more clips, just repeat this process. Easy like Sunday morning.
Checking out your video
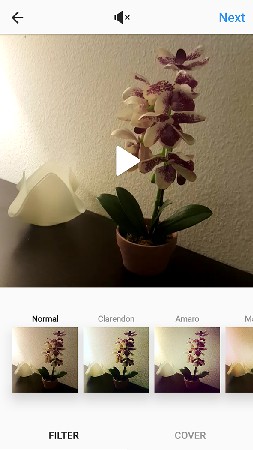
After you record your video, you'll want to review it before posting. From the Video screen, tap Next. You see the Filter screen.If you haven’t recorded for the minimum 3 seconds, you’ll see a pop-up above the minimum bar when you tap Next. This pop-up points to the minimum bar and tells you to record at least to that point. After a few seconds, the pop-up disappears and you can record another clip.
The video starts playing in the viewer. To stop playing the video, tap anywhere in the viewer. To resume, tap the play button, in the middle of the viewer. Begin playing the video by tapping the play icon.
You can toggle video sound on or off by tapping the speaker icon at the top of the page. If you’ve stopped your video, the video will start playing after you turn the video sound on or off.


