

Photoshop Elements 2019 provides you an art curator in the form of the Auto Curate check box in the upper-right side of the Organizer window. Click the Auto Curate check box, and Elements automatically analyzes the images in the Media Browser window. When completed, only the best photos (according to the auto analysis in Elements) are shown in the media browser.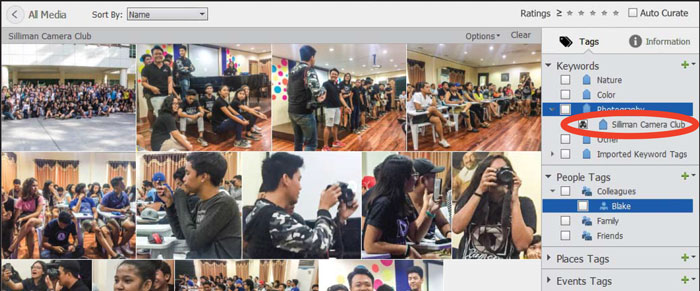 The Media Browser displays photos that have been tagged with the item you check in the Tags panel.
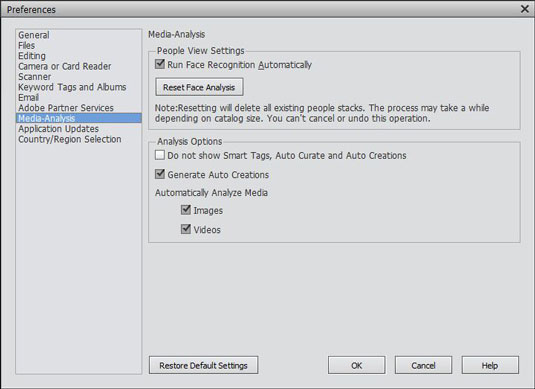 Check Generate Auto Creations in the Preferences dialog box.
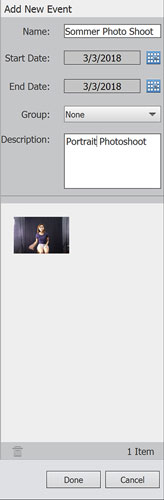 Add a new Event in the side panel.
The Media Browser displays photos that have been tagged with the item you check in the Tags panel.Working with the new Auto Creations feature in Elements 2019
New in Elements 2019 and building upon the auto curating feature added in Elements 2018 is the Auto Creation feature that is based on various events among your photos. You turn on Auto Creations by opening the Organizer Preferences (Command + K [Mac> or Ctrl + K [PC>) and click Media-Analysis in the left pane. Check Generate Auto Creations in the right pane, as shown here. Check Generate Auto Creations in the Preferences dialog box.Auto-generating creations
Elements searches through your catalog and groups like events such as birthdays, family outings, weddings, trips, vacations, and other important events. The first time you convert a previous catalog and have the Auto Creation feature enabled, it may take a while before the complete process is finished. After making auto creations, new files added to your catalog are automatically added to like events.Adding new events
Click the Add Event Icon to add a new event. A side panel opens, as shown. Provide a name and description and click Done. The new Event is added as an Event tag, and items related to the event are grouped together. Add a new Event in the side panel.
