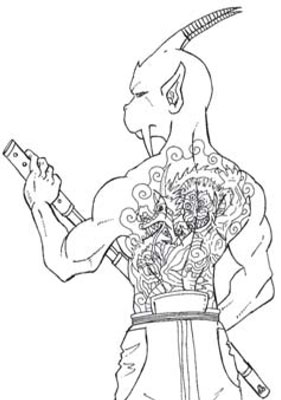
Drawing with the Pencil tool creates hard edges. You can’t get the soft, feathery edges that you can with the Brush tool. In fact, the edges of a pencil stroke can’t even be antialiased. (For more on antialiasing, see the following section.) Keep in mind that if you draw anything other than vertical or horizontal lines, your lines will have some jaggies when they’re viewed up close. But hey, don’t diss the Pencil just yet. Those hard-edged strokes can be perfect for web graphics. What’s more, the Pencil tool can erase itself, and it’s great for digital sketches, as shown.
 Illustration by Chris Blair
 The Pencil tool can be used for digital drawings.
Follow these steps to become familiar with the Pencil tool:
- Select the Pencil tool from the Tools panel. You can also press the N key. By default, the Pencil tool’s brush tip is the 1-pixel brush. Yes, even though the Pencil tip is hard-edged, we still refer to it as a brush. In the next few steps, you customize the brush by setting various options.
- Click the arrow and select your desired brush from the Brush Preset Picker drop-down panel.
- (Optional) To load another preset library, click the Brushes menu at the top of the panel.
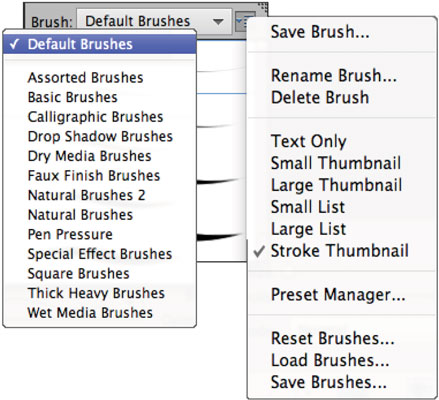
You aren’t limited to the standard old brushes. Check out the Assorted and Special Effects brushes found in the Brush drop-down list at the top of the Brush Preset Picker panel, as shown. You’ll be surprised by the interesting brushes lurking on these panels. Use them to create standalone images or to enhance your photographic creations. Access the menu on the Brush Preset Picker panel to save, rename, or delete individual brushes and also save, load, and reset brush libraries.
- Choose your brush size, and optionally, if you want to change the size of that brush tip, drag the Size slider.
- (Optional) If you want the background to show through your strokes, adjust the opacity by dragging the slider or entering an opacity percentage less than 100 percent.
The lower the percentage, the more the background images show through.
Your strokes must be on a separate layer above your images for you to be able to adjust the opacity and blend modes after you draw them. - Select a blend mode. Blend modes alter the way the color you’re applying interacts with the color on your canvas.
- (Optional) Select Auto Erase if you want to remove portions of your pencil strokes. For example, say that your foreground color is black and your background color is white, and you apply some black strokes. With Auto Erase enabled, you apply white if you drag back over the black strokes. If you drag over the white background, you apply black.
- Click and drag with the mouse to create your freeform lines. To draw straight lines, click at a starting point, release the mouse button, and then Shift-click at a second point.
 Choose from other brush libraries.


