You can create your own Calculated Fields for a pivot table in Excel 2013. Calculated Fields are computed by a formula that you create by using existing numeric fields in the data source. To create a Calculated Field for your pivot table, follow these steps:
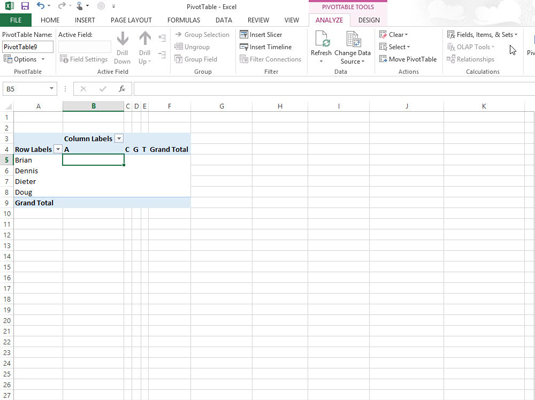
Click any of the cells in the pivot table and then select the Calculated Field option from the Fields, Items, & Sets button’s drop-down list, or press Alt+JTJF.

The Fields, Items, & Sets command button is found in the Calculations group on Analyze tab on the PivotTable Tools contextual tab.
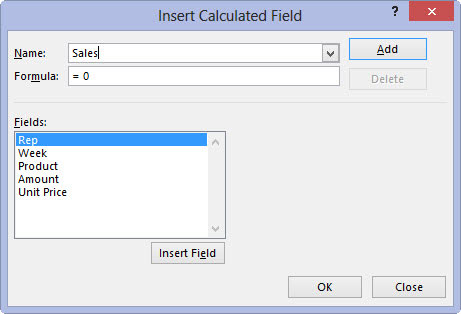
Excel opens the Insert Calculated Field dialog box.
Enter the name for the new field in the Name text box.

Next, you create the formula in the Formula text box by using one or more of the existing fields displayed in the Fields list box.
Click the Formula text box and then delete the zero (0) after the equal sign and position the insertion point immediately following the equal sign (=).

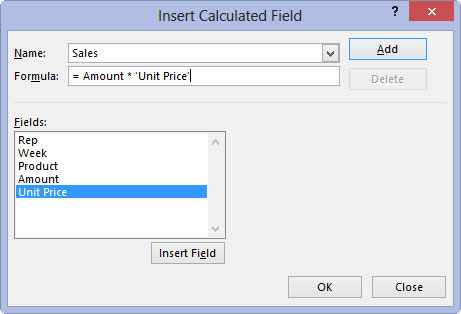
Now you’re ready to type in the formula that performs the calculation. To do this, insert numeric fields from the Fields list box and indicate the operation to perform on them with the appropriate arithmetic operators (+, -, *, or /).
Enter the formula to perform the new field’s calculation in the Formula text box, inserting whatever fields you need by clicking the name in the Fields list box and then clicking the Insert Field button.

When you finish entering the formula for your calculated field, you can add the calculated field to the PivotTable Fields task pane by clicking the Add button. After you click the Add button, it changes to a grayed-out Modify button. If you start editing the formula in the Formula text box, the Modify button becomes active so that you can click it to update the definition.
Click OK in the Insert Calculated Field dialog box.

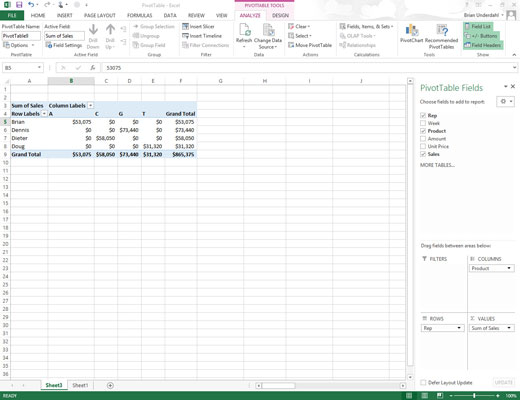
This action closes the Insert Calculated Field dialog box and adds the summary of the data in the calculated field to your pivot table.
After you finish defining a calculated field to a pivot table, Excel automatically adds its name to the field list in the PivotTable Fields task pane and to the VALUES area thereby assigning the calculated field as another Data item in the body of the pivot table.


