Excel 2016 makes it easy to insert online graphic images into your worksheet. The Insert Pictures dialog box enables you to use Microsoft's Bing search engine to search the entire web for images to use. If that's not enough, you can also download images that you've saved in the cloud on your Windows OneDrive or your social media sites, such as Facebook or Flickr.
To download an image into your worksheet from any of these sources, you click the Online Pictures button in the Illustrations group on the Insert tab of the Ribbon (Alt+NF). Excel opens the Insert Pictures dialog box similar to the one shown, containing the following options:
Bing Image Search text box to use the Bing search engine to locate images on the web of a particular type that you want to add to your worksheet
OneDrive Browse button to locate images saved on your SkyDrive to add to your worksheet
 Searching Office.com for clip art images of Tablet PCs in the Insert Pictures dialog box.
If you use a social media site such as Facebook or the photo-sharing site Flickr on your Windows device, you can add these locations as options to your Insert Pictures dialog box. Simply select the app's icon that appears at the bottom of the Insert Pictures dialog box to connect Office with the particular app. You can then insert images from one of these sites after selecting its option in the Insert Pictures dialog box.
Inserting online images with Bing Image Search
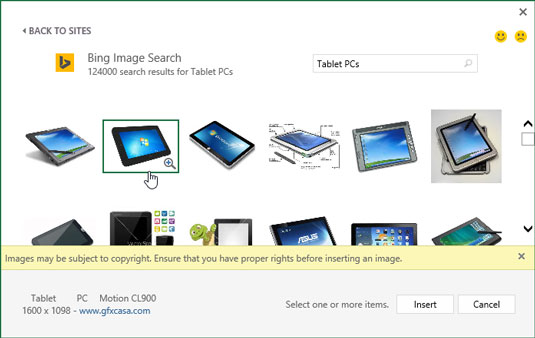
To download an image with Bing, open the Insert Pictures dialog box (Alt+NF), then click in the Search Bing text box where you type the keyword for the types of images you want to locate. After you press Enter or click the Search button (the magnifying glass icon), the Insert Pictures dialog box displays a scrollable list of thumbnails for images matching your keyword, as shown here.

Below the initial row of thumbnails, the Insert Pictures dialog box also displays a disclaimer informing you that the online images that Bing has returned in the search use what's called Creative Commons licensing that grants free distribution of what is otherwise copyrighted material under certain conditions (often noncommercial or educational use).
The disclaimer then goes on to urge you to review the license for any image you insert into your worksheet so that you may be certain that you are in compliance with these conditions (always a good idea). After reading this disclaimer, you can close its text box by clicking its Close button with the x in it.
You can then click a thumbnail in the list to display a short description plus the size (in pixels) of the image in the lower-left corner of the Insert Pictures dialog box as well as a hyperlink to the source web site (which you can use to visit this site to review the free use conditions of its Creative Commons license).
To get a better view of a particular image whose thumbnail is highlighted or selected in the list, click the View Larger button that appears in the thumbnail's lower-right corner (the magnifying glass with a plus sign in it). Excel then displays a slightly larger version of the thumbnail in the center of the dialog box while at the same time blurring out all the other thumbnails in the background.
To insert one of the located images into the current worksheet, double-click its thumbnail if it's not already selected in the list. If the thumbnail is selected, you can insert the image by clicking the Insert button or by pressing Enter.


