Excel 2010's Print Titles command enables you to print particular row and column headings on each page of the report. Print titles are important in multi-page reports where the columns and rows of related data spill over to other pages that no longer show the row and column headings.
Don't confuse print titles with the header of a report. Even though both are printed on each page, header information prints in the top margin of the report; print titles always appear in the body of the report — at the top, in the case of rows used as print titles, and on the left, in the case of columns.
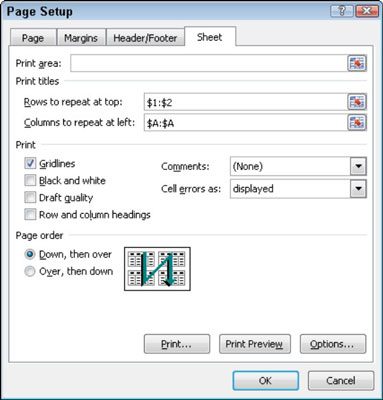
Click the Print Titles button on the Ribbon's Page Layout tab.
The Page Setup dialog box appears with the Sheet tab displayed.
To designate worksheet rows as print titles, select the Rows to Repeat at Top text box and then drag through the row number(s) (in the worksheet frame) with data you want to appear at the top of each page.

If necessary, reduce the Page Setup dialog box to just the Rows to Repeat at Top text box by clicking the text box’s Collapse/Expand button.
To designate worksheet columns as print titles, select the Columns to Repeat at Left text box and then drag through the column letter(s) (in the worksheet frame) with the data you want to appear at the left edge of each page.
If necessary, reduce the Page Setup dialog box to just the Columns to Repeat at Left text box by clicking its Collapse/Expand button.
Click OK.

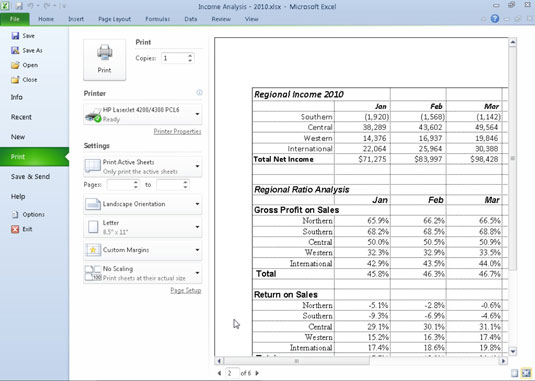
You can preview the worksheet to determine if the print titles are set up correctly.


