Microsoft Excel 2010 lets you save your workbook files directly in the PDF (Portable Document Format) or XPS (XML Paper Specification) file format. These formats enable people to open and print your Excel worksheets even if they don't have Excel installed on their computers.
Follow these steps to save an Excel 2010 workbook in PDF or XPS format:
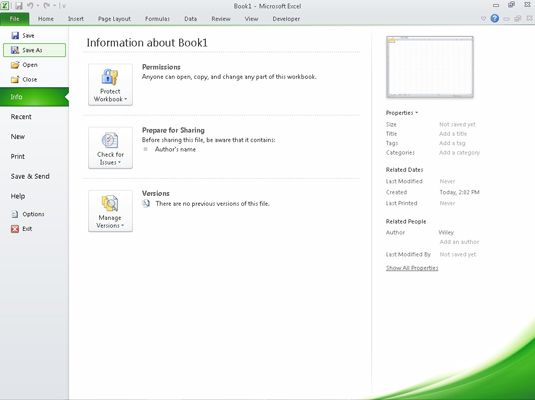
Click the File tab and choose Save As.

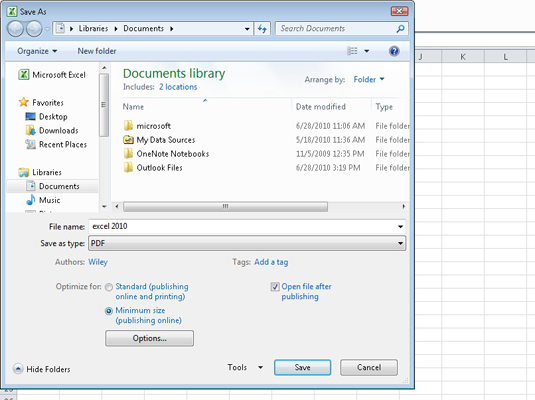
The Save As dialog box appears.
In the Navigation pane, select the folder in which you want to save the file.
(Optional) If you want to save the workbook file inside a new subfolder within the folder currently open in the Save As dialog box, you can click the New Folder button on the toolbar and then type the name of the folder and press Enter.
Type a descriptive name for the file in the File Name box.
You can use the original name if you want so that your original Excel file will appear right next to the PDF or XPS file in an alphabetical list.
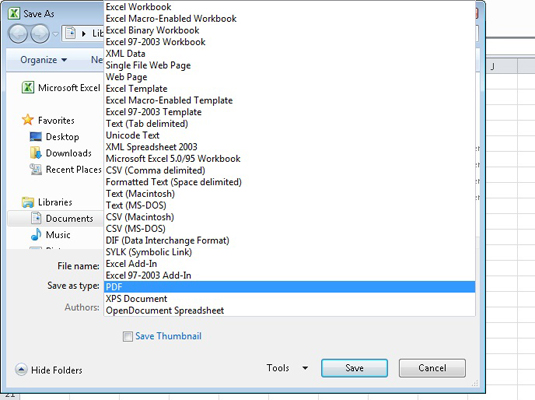
Click the Save as Type arrow and select either PDF or XPS Document.

Excel displays additional options that apply to PDF and XPS files near the bottom of the Save As dialog box.
Beside the Optimize For heading, select Standard or Minimum Size.

If you want to make the PDF or XPS file as small as possible (because your worksheet is large), select the Minimum Size (Publishing Online) option button.
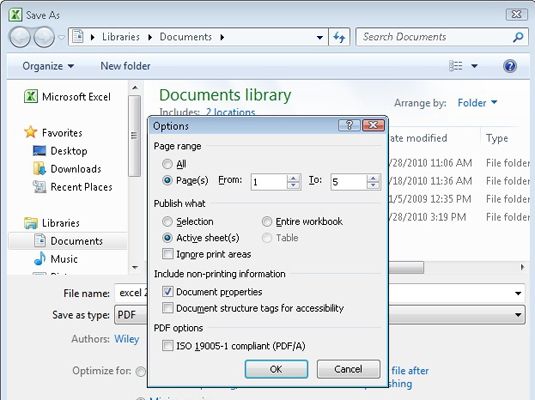
(Optional) If you want to change which parts of the workbook are saved in the PDF or XPS file, click the Options button; then make the appropriate selections and click OK.

From the Options dialog box, you can change how much of the worksheet to convert as well as including the document properties in the output.
Click the Save button.
Excel saves the workbook in the PDF or XPS file format that you selected in Step 4, and automatically opens the file in Adobe Reader or XPS Reader (unless you deselected the Open File After Publishing check box in the Save As dialog box).


