The Page Break preview feature in Excel 2016 enables you to spot and fix page break problems in an instant, such as when the program wants to split information across different pages that you know should always be on the same page.
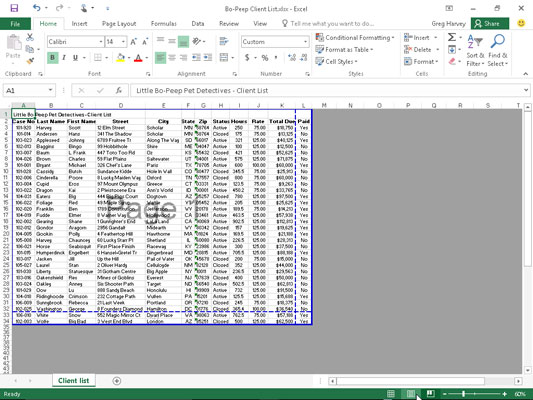
This figure shows a worksheet in Page Break Preview with an example of a bad vertical page break that you can remedy by adjusting the location of the page break on Page 1 and Page 3. Given the page size, orientation, and margin settings for this report, Excel breaks the page between columns K and L. This break separates the Paid column (L) from all the others in the client list, effectively putting this information on its own Page 3 and Page 4 (not shown).

To prevent the data in the Paid column from printing on its own pages, you need to move the page break to a column on the left. In this case, I moved the page break between columns G (with the zip-code data) and H (containing the account status information) so that the name and address information stays together on Page 1 and Page 2 and the other client data is printed together on Page 3 and Page 4.

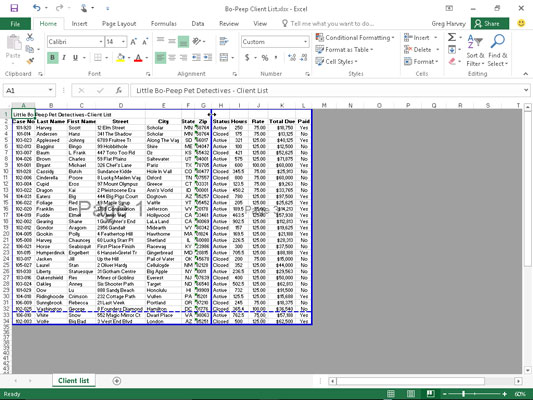
This figure shows vertical page breaks in the Page Break Preview worksheet view, which you can accomplish by following these steps:
Click the Page Break Preview button (the third one in the cluster to the left of the Zoom slider) on the Status bar, or click View→Page Break Preview on the Ribbon or press Alt+WI.
This takes you into a Page Break Preview worksheet view that shows your worksheet data at a reduced magnification (60 percent of normal in the figure) with the page numbers displayed in large light type and the page breaks shown by heavy lines between the columns and rows of the worksheet.
The first time you choose this command, Excel displays a Welcome to Page Break Preview dialog box. To prevent this dialog box from reappearing each time you use Page Break Preview, click the Do Not Show This Dialog Again check box before you close the Welcome to Page Break Preview alert dialog box.
Click OK or press Enter to get rid of the Welcome to Page Break Preview alert dialog box.
Position the mouse pointer somewhere on the page break indicator (one of the heavy lines surrounding the representation of the page) that you need to adjust; when the pointer changes to a double-headed arrow, drag the page indicator to the desired column or row and release the mouse button.
For the example shown, the page break indicator was dragged between Page 1 and Page 3 to the left so that it's between columns G and H. Excel placed the page break at this point, which puts all the name and address information together on Page 1 and Page 2. This new page break then causes all the other columns of client data to print together on Page 3 and Page 4.
After you finish adjusting the page breaks in Page Break Preview (and, presumably, printing the report), click the Normal button (the first one in the cluster to the left of the Zoom slider) on the Status bar, or click View → Normal on the Ribbon or press Alt+WL to return the worksheet to its regular view of the data.
You can also insert your own manual page breaks at the cell cursor's position by clicking Insert Page Break on the Breaks button's drop-down menu on the Page Layout tab (Alt+PBI) and remove them by clicking Remove Page Break on this menu (Alt+PBR). To remove all manual page breaks that you've inserted into a report, click Reset All Page Breaks on the Breaks button's drop-down menu (Alt+PBA).


