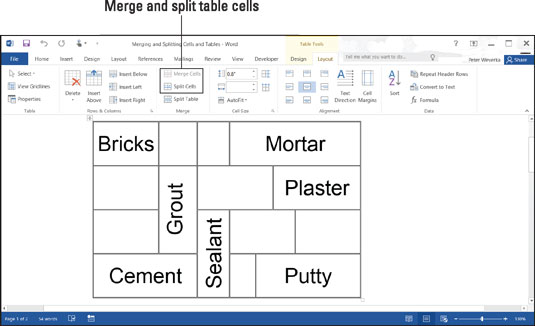
Merge and split cells to make your Word 2016 tables a little more elegant than run-of-the-mill tables. Merge cells to break down the barriers between cells and join them into one cell; split cells to divide a single cell into several cells (or several cells into several more cells). In the table shown, cells in rows and columns have been split or merged to create a curious-looking little table.

Select the cells you want to merge or split, go to the (Table Tools) Layout tab, and follow these instructions to merge or split cells:
Merging cells: Click the Merge Cells button (you can also right-click and choose Merge Cells).
Splitting cells: Click the Split Cells button (you can also right-click and choose Split Cells). In the Split Cells dialog box, declare how many columns and rows you want to split the cell into and then click OK.
Another way to merge and split cells is to click the Draw Table or Eraser button on the (Table Tools) Layout tab. Click the Draw Table button and then draw lines through cells to split them. Click the Eraser button and drag over or click the boundary between cells to merge cells. Press Esc when you finish drawing or erasing table cell boundaries.
Need to split a table? Place the cursor in what you want to be the first row of the new table, go to the (Table Tools) Layout tab, and click the Split Table button.


