Nowadays, however, we operate in a boundary-less world. we check email from our personal devices, we do our work at the office or at home — or even at the beach — and we use cloud services outside the perimeter of an organization's data center. we do these things because we want to be productive, but sometimes this productivity can mean sacrificing security.
In Office 365, you can continue to do the things you do to be productive while at the same time stay secure. In Exchange Online (the technology driving your email), for example, you can encrypt your email so that only the intended recipients of the message will be able to read it. You can apply protection to your email so if it’s confidential, the email can only be read by people within your organization. If someone accidentally forwards or copies a recipient outside of the organization on email marked confidential, that recipient will get the email but he or she won’t be able to read it.
These security features for protecting email are available through the Office 365 Message Encryption (OME) service.
Licensing requirements for Office 365 Message Encryption
Office 365 Message Encryption (OME) is part of the Office 365 subscriptions listed as follows. There is no need to purchase additional licenses for users when the following subscriptions are assigned to them:- Office 365 E3 and E5 (Enterprise)
- Office 365 A1, A3, and A5 (Education)
- Office 365 G3 and G5 (Government)
- Enterprise Mobility + Security E3
- Microsoft 365 E3
- Exchange Online Plan 1 or Plan 2
- Office 365 F1 or E1
- Office 365 Business Premium or Business Essentials
Enabling Office 365 Message Encryption
If you’ve purchased Office 365 licenses with OME capabilities after February 2018, OME is automatically configured and your users can start using the service.If you purchased Office 365 license prior to February 2018, you need to enable Azure Rights Management (Azure RMS) from the Office 365 portal. After enabling Azure RMS, Microsoft will automatically configure OME in your Office 365 tenant. Here are the steps to enable Azure RMS:
- Log on to the Office 365 portal with a Global Administrator account and then click the Admin icon.
- Click Settings from the menu on the left panel.
- Click Services & Add-ins and then select Microsoft Azure Information Protection from the list of services.
- Click Manage Microsoft Azure Information Protection settings from the pane.You will be asked to authenticate with your Office 365 credentials.
- In the Rights Management page, click the Activate button.
- Before closing the page, verify that the Rights Management Is Activated notification is displayed with the green check mark next to it.
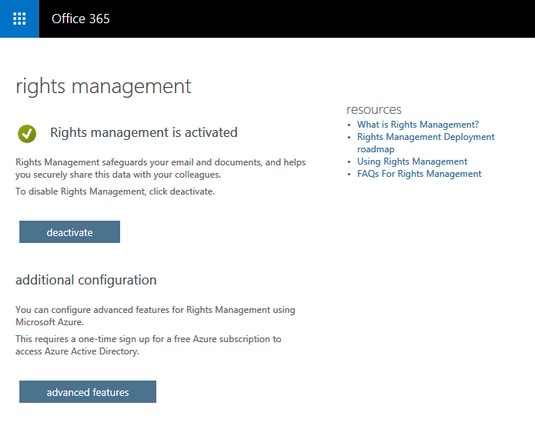 Rights management is activated in Office 365.
Sending an encrypted email in Office365
With OME enabled in your Office 365 tenant, users can immediately start sending encrypted email to recipients within or outside the organization based on the default policies available in OME. Depending on your subscription and the functionalities Microsoft has rolled out, you will find two or more pre-configured encryption policies. The two default policies in the Office 365 E3 or the Azure Information Protection Plan 1 subscriptions available are Encrypt and Do Not Forward.To apply these policies to an email using the Outlook desktop app, follow these steps:
- In the Outlook desktop application, compose a new email and add the recipients.
- From the ribbon, click Options.
- Click the Permission button and then select the appropriate encryption policy.
- Click Send to send your email.
- Compose a new email and add the recipients.
- From the ribbon, click Protect.
- Click Change Permissions from the notification bar to display the available options and then select the appropriate encryption policy.
- Click Send to send your email.
Using the Encrypt policy
When you use the Encrypt policy, the email message will be encrypted on its way to the recipient. Once it reaches the recipient, the message will be decrypted so that it’s readable.Using the Encrypt policy does not prevent the recipient from forwarding the email to someone else. The recipient can print out the email, post it on social media, or frame it on his or her wall. If additional protection is required, the Global Admin for the Office 365 Portal will need to create custom policies.
Currently, Outlook Online, Outlook for iOS, and Outlook for Android will automatically display the decrypted message on the screen. For other email applications, the email will provide a link to allow the recipient to read the decrypted message. There are plans underway to expand the list of supported applications in the near future including the Outlook desktop application, which is currently in preview.
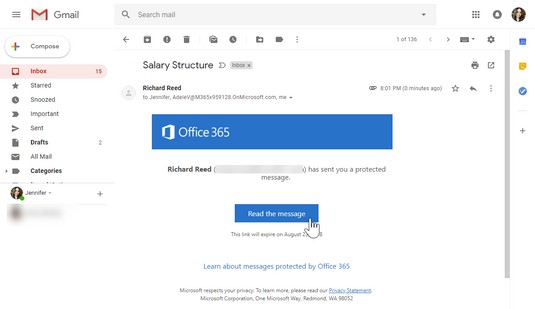 Reading an encrypted message in non-supported apps.
Using the Do Not Forward policy
The Do Not Forward policy also encrypts the email message on its way to the recipient, but it has an additional policy restricting the recipients from forwarding the email to someone else. If any of the recipients forwards the email to others, new recipients who try to open the email will get a message saying that they don’t have permission to view the message.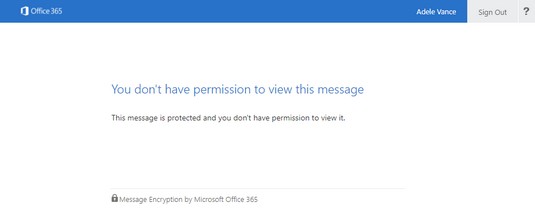 Do Not Forward policy error message.
Making Outlook and Office 365 work for you
As a cloud service, Office 365 has intelligent experiences designed to help you prioritize work so you can be productive. Built-in AI in Outlook allows you to re-focus your energy on what’s important. And when Outlook misbehaves, there is a built-in tool to help you troubleshoot common Outlook issues without the need to engage your support team.Filtering out the noise with Focused Inbox
Exchange Online in Office 365 has built-in spam and spoof filters that block known unwanted and malicious email from reaching your mailbox. Yet even with filters, our mailboxes can still end up being bloated with email from the pizza place, our cable provider, and our favorite shopping site. When you’re trying to be productive, it’s easy to get distracted by legitimate but unimportant email.The Outlook desktop application and Outlook Online come with a functionality called Focused Inbox to address that challenge. Focused Inbox helps with mailbox management by acting as an automatic sorter that puts all your important email into the Focused tab and the less important ones in the Other tab.
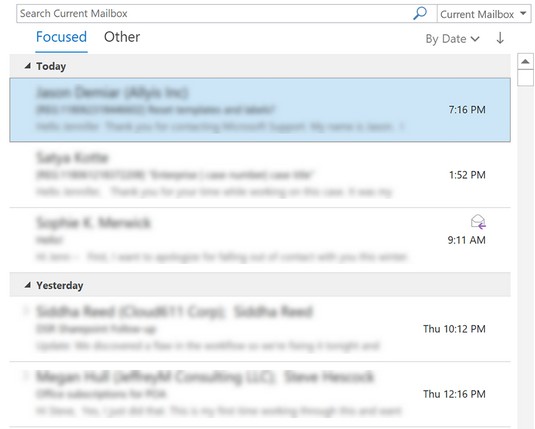 The Focused Inbox.
Built-in AI in Office 365 determines what email goes into what tab. Email from the contacts you interact with a lot will go to the Focused tab while bulk email from your shopping site will go to the Other tab to filter out the noise. You can also train the AI to fine-tune the categorization by moving email that ends up in the wrong tab. The more you train the AI, the better it will learn your behaviors to ensure that your inbox feels just right for you.
Diagnosing common Outlook problems with SARA
One of the advantages Microsoft has in running cloud services is its access to error logs and signals from the devices and users interacting with the system. Those logs and signals are transmitted to Microsoft databases where they are monitored and analyzed. Based on those insights, Microsoft is able to improve its service or create self-service solutions for customers.SARA is short for Support and Recovery Assistant, a diagnostics tool built into Outlook. It’s a handy tool that automatically fixes common errors users have encountered in Office 365, such as Outlook problems, Office installations, and more.
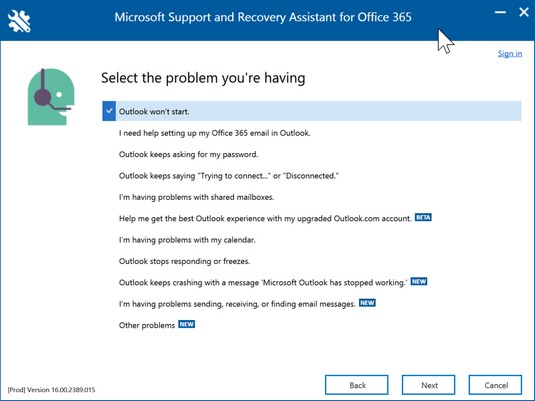 Common Outlook problems SARA can troubleshoot.
If you are experiencing any of these issues and want to run SARA, follow these steps:
- In Outlook desktop application, click File from the ribbon.
- From the backstage left panel, click Support.
- Click Support Tool to install SARA.This action will connect to the Office 365 systems and will download the tool.
- Once the tool finishes downloading and starts running, follow the prompts based on the issue you are trying to resolve.Depending on your issue, the process could take a few minutes to half an hour.


