You can do some formidable tasks with Outlook 2013. Time will tell (and pretty quickly at that) how much more you'll be able to do with future versions of Outlook, Internet Explorer, and all the other powerful technology associated with those applications.
Following are a few advanced Outlook adventures to try out.
Customize the Quick Access Toolbar.
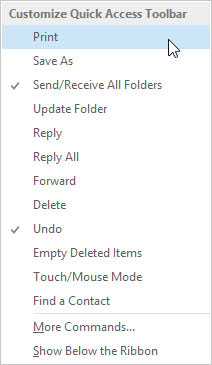
Office 2013 has an arrangement of controls that eliminates menus in favor of big Ribbons, tabs, and buttons. With an old-fashioned menu system, you know that everything you want to do is on a menu somewhere. In the new arrangement . . . who knows?
There’s hope, however. After you find the tool you need, you can right-click the tool and choose Add to Quick Access Toolbar. That adds a tiny icon to that thin strip of icons that sits just above the Ribbon (or below the Ribbon, if you move it there).
If you’ve ever bookmarked a website, you know how this works. If you right-click the Quick Access toolbar and choose Show the Quick Access Toolbar below the Ribbon, that’s exactly what happens.
Each Outlook form also features its own Quick Access toolbar as well. That’s useful for speeding up tasks that you perform frequently. If you like to print individual e-mail messages from time to time, you can add the Quick Print command when you’re reading or composing a message. That way, the Print command is a couple of clicks closer.
Wise up your messages with Smart Art.
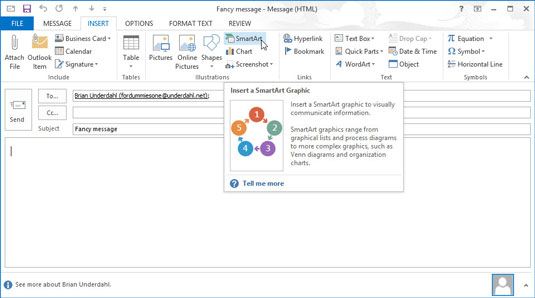
Design can make you look smart if you know what you’re doing. If you don’t know what you’re doing, you can fall back on Smart Art, another intriguing feature on the Ribbon’s Insert tab. Smart Art helps you create colorful, annotated designs to add to your e-mail.
Translate your e-mail messages.
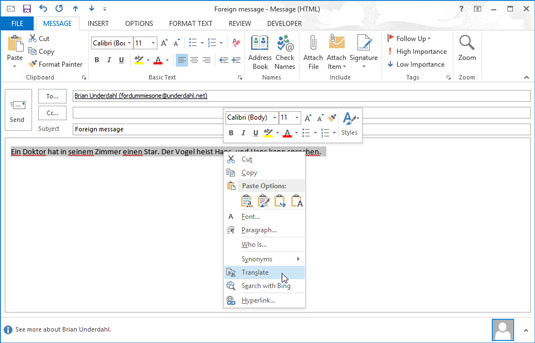
If your incoming e-mail messages are so confusing that they seem like they’re written in a foreign language, maybe they are. You can translate incoming e-mail messages in Outlook 2013 by highlighting the confusing text, right-clicking, and choosing Translate.
Alternately, you can click the Translate button in the Ribbon. If the translations don’t even make sense, you can feel better knowing it’s not your fault that you can’t understand the gibberish people are sending you.
Add charts for impact.
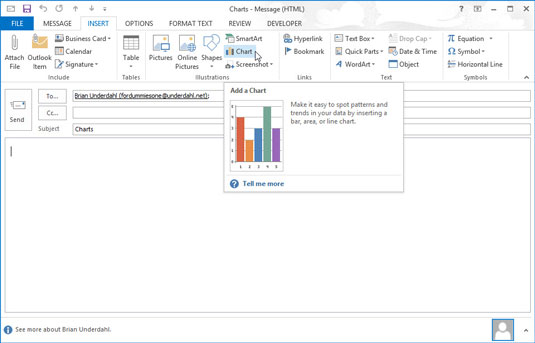
The Chart tool is just beneath the Smart Art button on the Ribbon’s Insert tab. The tool can make the thoughts you express in your e-mail look positively orderly (no matter how disordered your mind may be).
From inside a new e-mail message, click the Insert tab and choose the Chart tool. Choose a general type from the list on the left or choose a specific type from the list on the right. The mechanics of creating an Outlook chart are very similar to those for creating an Excel chart.
Use symbols in e-mail.
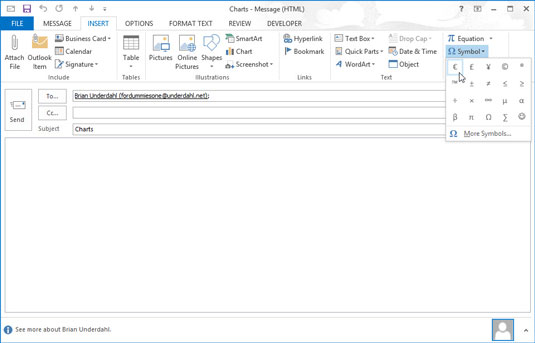
If you frequently use symbols such as the Euro currency symbol, you can add those symbols to your e-mail messages by clicking the Symbol button on the Insert tab while composing an e-mail message; just choose the symbol you want. If you choose More Symbols, you can also insert clever things like fractions, arrows, and strange hieroglyphics to baffle your recipients into complying with your wishes.
Open multiple calendars.
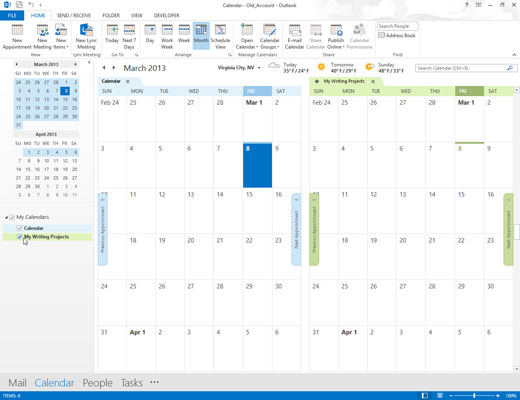
You can create more than one calendar in Outlook. You might want to do so to track the activities of more than one person, or to keep your business life separate from your personal life (which is always a good idea). The tricky part of keeping multiple calendars is dealing with schedule conflicts between the two.
To see two calendars at a time, click the check box next to each calendar name in the Navigation pane.
Superimpose calendars.
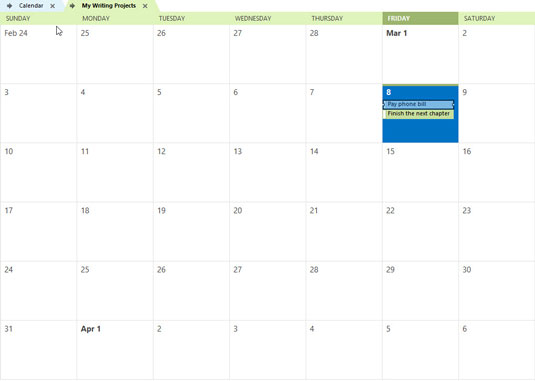
An even slicker way to avoid conflicts on multiple calendars is to superimpose one calendar on top of another. When you have two calendars open, a small arrow appears next to the name of one. When you click that arrow, both calendars appear, one atop the other, with both sets of appointments showing.
The appointments in the bottom calendar appear slightly opaque, while the top calendar items look clearer and bolder. When calendars are superimposed, you can see right away when time is available on both.
View an unusual number of days.
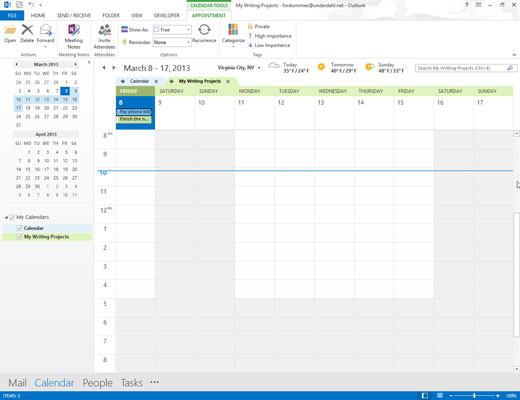
When you’re looking at your calendar, you can decide to see only three days or eight days (or, for that matter, any number between one and ten days). Hold down the Alt key and type the number of days you want to see. Press Alt+2 for two days, Alt+3 for three days, and so on. Pressing Alt+0 (zero) gives you ten days.
Select dates as a group.
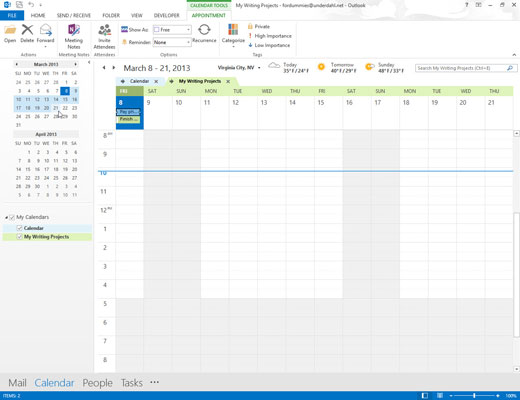
When you’re viewing a range of dates, you don’t have to limit yourself to fixed days, weeks, or months. Suppose that you want to look at a range of dates from September 25 to October 5. On the To-Do bar, click September 25 and then (while pressing the Shift key) click October 5. All the dates in between are selected and appear in the Information Viewer.
Pin contact cards.
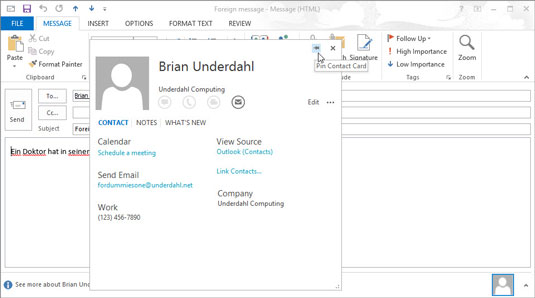
If you want to keep a person’s contact information on-screen while you do something else, you can hover your mouse pointer over a person’s e-mail address until a little rectangle appears. That’s called a contact card. Near the upper-right corner of the contact card there’s a tiny picture of a pushpin.
Click that picture to make the contact card float on the screen until you click the picture again to make it go away.
You’ve pinned a contact and it’s not there any more? Don’t worry. That’s probably because you’re using Outlook in its default full-screen mode. When you click off the pinned contact, the full-screen Outlook screen hides it. Click the Restore Down or Minimize button at the upper right of the Outlook screen. See the contact now? Good.


