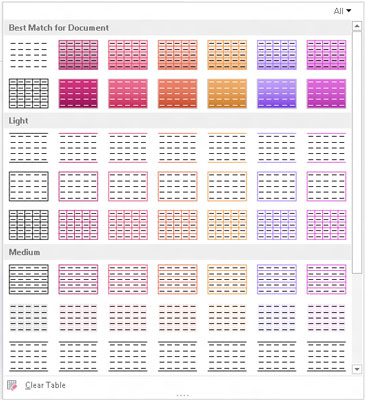
After you’ve created a table in PowerPoint 2013, you can set its style by using the controls under Table Tools on the Ribbon. The easiest way to format a table is by applying one of PowerPoint’s predefined table styles.
Before you apply a style, however, use the check boxes that appear at the left side of the Design tab under Table Tools on the Ribbon. These check boxes determine whether PowerPoint uses special formatting for certain parts of the table:
Header Row: Indicates whether the style should format the first row differently than the other rows in the table
Total Row: Indicates whether the style should format the last row differently than the other rows in the table
Banded Rows: Indicates whether alternating rows should be formatted differently
First Column: Indicates whether the style should format the first column differently than the other column in the table
Last Column: Indicates whether the style should format the last column differently than the other columns in the table
Banded Columns: Indicates whether alternating columns should be formatted differently
After you’ve set the Quick Style options, you can apply a Table Style to the table by clicking the style you want to apply. If the style doesn’t appear in the Table Styles group under Table Tools on the Ribbon, click the More button to reveal the Table Styles gallery. This gallery displays all the built-in styles provided with PowerPoint.

In addition to using one of the preselected table styles, you can format each cell and line in your table by using the following controls under Table Tools:
Shading: Sets the background color for the selected cells.
Borders: Lets you control which edges of the selected cells have borders.
Effects: Applies bevels, shadows, and reflections. (Note that you can apply bevels to individual cells, but shadows and reflections apply to the entire table.)


