


You can set various options for playing video files in PowerPoint 2013 via the Video Tools Playback tab on the Ribbon. As you can see, this tab contains several controls that let you edit the way the sound file is played.

Control when a video is played
By default, videos play when you click the Play button that appears beneath the video frame. If you want the video to start automatically when you display the slide, change the option in the Start drop-down list (found in the Video Options group on the Video Tools Edit tab) from On Click to Automatically.
Loop a video
If the video is short, you may want to repeat it over and over again until you move to the next slide. To do so, select the Loop Until Stopped check box found in the Video Options group.
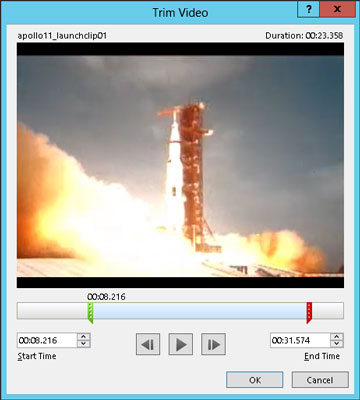
Trim a video clip
The Trim Video button summons the Trim Video dialog box. Here, you can select the portion of the video clip you want to play in your presentation. You can choose the start and end points of the video by dragging the start pointer or the red end pointer over the image of the video’s soundtrack wave, which appears immediately beneath the video frame.
Or, you can enter the time (in seconds) in the Start Time and End Time boxes.
Play the video full screen
If you want the video to take over the entire screen, select the Play Full Screen check box. Note that this option works best for high-quality videos. If the video is of lower quality, it may not look good when played in full-screen mode.
Fade the video’s sound in and out
The Fade In and Fade Out controls for video clips work just as they do for audio clips. In other words, they affect the video’s sound track, not the video image itself. You can use these controls to gradually fade the video’s sound in and out.


