Microsoft has integrated cloud computing into PowerPoint 2016 by providing its own dedicated cloud storage resource, called OneDrive, and designating it as one of the primary places you can store your PowerPoint presentations. (OneDrive used to be called SkyDrive, but Microsoft had to change the name because of a trademark lawsuit.)
When you install Office 2016, you are given the opportunity to create a free OneDrive account that offers up to 15GB of free cloud storage, with the capability to purchase additional storage. If you subscribe to Office 365, you get 1TB of cloud storage.
In addition to storing PowerPoint presentations on OneDrive, you can also share your presentations with other OneDrive users so that you can collaboratively view and edit your work. Before you can share a presentation with another user, you must first save the presentation to your OneDrive account. To do so, just follow these steps:
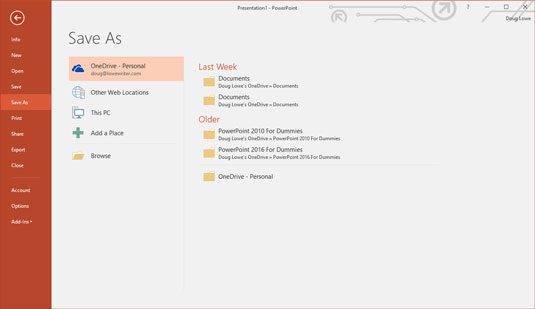
Choose File→ Save As.

The Save As page appears, which offers several locations to which the presentation can be saved, as shown. The default location is your OneDrive account.
Click the OneDrive location where you want to store your presentation.

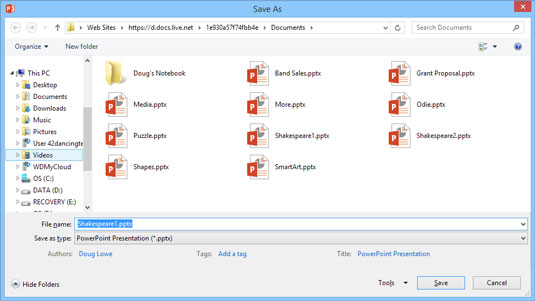
The Save As dialog box appears, as shown. As you can see, this dialog box automatically navigates to your OneDrive account’s Documents folder.
Navigate to another OneDrive folder or create a new OneDrive folder.
You can navigate OneDrive as if it were a local hard drive. And you can create a new folder by clicking the New Folder button.
Change the filename and then click Save.
The presentation is saved to your OneDrive.


