To create a stack of mail merge envelopes in Word 2013, which is far more classy and professional than using peel-and-stick mailing labels, and a timesaver, abide by the following steps:
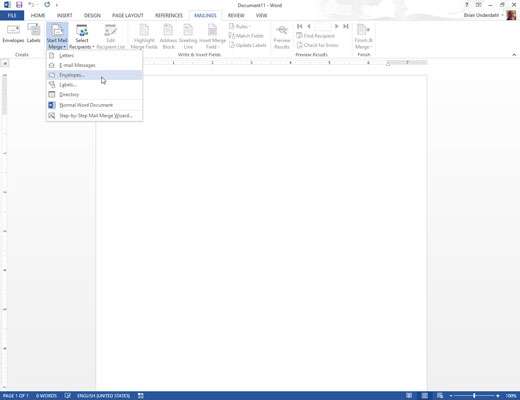
Start a new document. On the Mailings tab, choose Start Mail Merge→Envelopes.

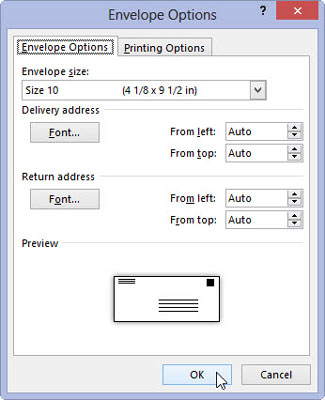
The Envelope Options dialog box appears. You can set the envelope size and font options, if necessary.
Click OK.

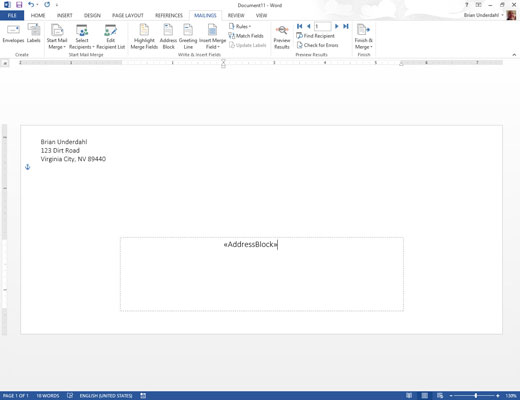
Word’s window changes to reflect a typical envelope, a size specified in the Envelope Options dialog box.
Type the return address.
Normally, an envelope mail merge doesn’t use different return addresses for each envelope. So type the return address where the insertion pointer is blinking in the upper-left corner of the envelope.
Press Shift+Enter at the end of a line in the return address. The soft return you set keeps the lines in the return address tightly together.
Click the mouse in the text box found in the center of the envelope.
Word stuck a text box in the middle of the envelope, which is where you place the recipient’s address. If you don’t see the box, just click the mouse where you think the address should go.
If necessary, type any unchanging text in the recipient’s address.

Odds are good that each recipient has a different address, so you probably don’t have to type anything for this step. Instead, the information from the recipient list — the fields — is inserted here.
Save the envelope.
Your next task is to use the recipient list to gather the information for your mailing.


