If you’re using QBO Plus in Canada, the UK, United States, or Australia, you can take advantage of the Projects feature. Currently, the feature is in “preview” mode — which means it’s available only in QuickBooks Online Labs. To turn on the feature, follow these steps:
- Click the Gear, and then QuickBooks Labs.You’ll find QuickBooks Labs at the bottom of the Your Company column.
QBO displays this page.
 The QuickBooks Labs page.
 - Click the Off button beside Track Your Projects to turn on the Projects feature.
The Off button changes to On, and a message appears, telling you that QBO has activated the Projects plug-in.
- Click Done to return to your QBO company.
A new option, Projects, appears in the Navigation pane. When you click the option, QBO prompts you to set up your first project.
 The new Projects page in QBO.
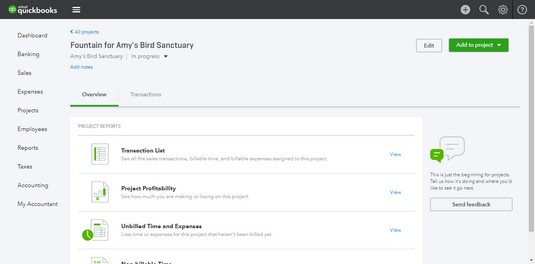
 The Overview page for a project’s details.
The terminology here can get a little confusing; above, you’re looking at the Overview page for the details of a project. This page shows you the list of reports related to the project’s information that you can view and might be better titled “Project Reports” instead of “Overview.” The Transactions page (click the link beside Overview) lists all transactions associated with the project. If you click Projects in the Navigation bar at this point, the page shows a list of projects you’ve established; you can click any project to display the page shown below.
Even though you select a customer when you create the project, QBO doesn’t pull in existing transactions for the customer to the Projects page. Newly created projects have no transactions — and therefore, logically, the Transactions page is empty and reports contain no information.
If you’re thinking of changing the customer name on existing transactions to pull those transactions into the project, be careful. Changing the customer can have repercussions through QBO. For example, if you try to change the customer assigned to a payment transaction that you have deposited, QBO will warn you that you must remove the transaction from the deposit before you can change the customer name. And, that will mess up your deposit unless you remember to re-add the payment to the deposit. Things can get complicated very quickly.
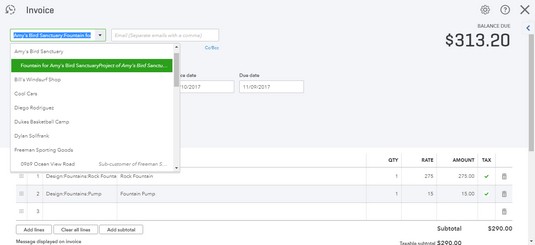
Make sure that you choose the project from the Customer drop-down list as you create the transaction instead of the customer.
In the image below, an invoice transaction for the project is being created. And, you have a new place to start when you want to add a transaction to a project; although you can start from the Create menu or from Sales in the Navigation bar, you also can click the Add to Project button after you click Projects in the Navigation bar. Note that you can’t create a Sales Receipt from the Projects page; use the Create menu or the Sales page. Creating an invoice for the project.
Once your project collects transactions, reports become meaningful. The Transactions List report shows, by default, exactly what you’d expect: all the transactions assigned to the project.
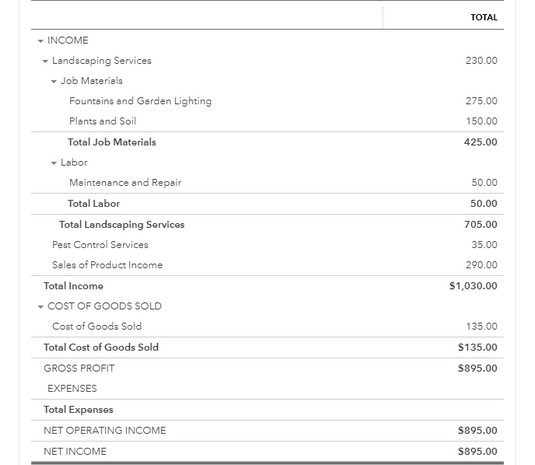
The Project Profitability report is, essentially, a Profit and Loss report for the project; you see a sample below.
 A sample Project Profitability report.
The Unbilled Time and Expenses report shows you time assigned to the project but not yet billed, and the Non-billable Time report shows you time recorded to the project that you can’t bill to the project.
The Project feature also provides you with ways of “disposing” of the project. If you check Project in the Navigation bar and then click the Options button for a particular project, you can opt to mark the project as completed, mark the project as canceled, or delete the project. Note that you can’t delete any project that has transactions associated with it; you must mark the project completed or canceled.


