


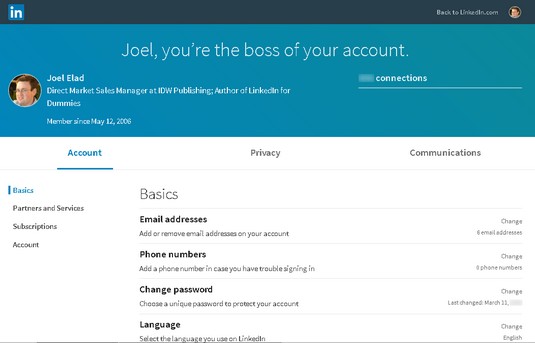
Your Settings & Privacy page will look similar to most other users of LinkedIn, so it will probably look similar to the one below except the name, headline, number of connections, and date you joined LinkedIn will reflect your own account.
 Coordinate all your settings here.
First, check out the three headers across the middle of the screen: Account, Privacy, and Communications. Just click one of the three to go to that page of settings. Note that as you scroll down the page, the headers stay at the top of your screen.
On the left side of the screen is a navigation menu. You can click any section name in the left menu to jump to that part of the selected Settings page. For example, the Account page has four sections: Basics, Partners and Services, Subscriptions, and Account. Below, the Basics section is selected. As you scroll down through a section of the Account page, the section menu item is highlighted.
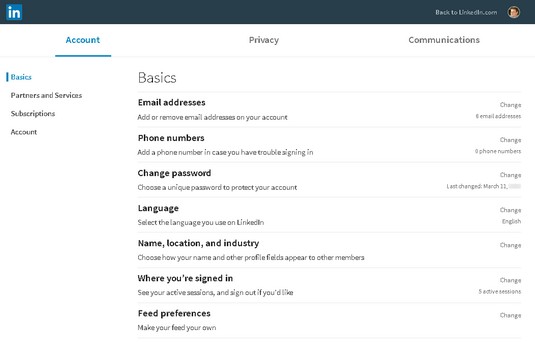 The sections for the selected page (Account) appear on the left.
Note the Change link to the right of each setting. When you want to change a setting, start by clicking Change. The area below the setting expands so you can make changes on the same page. For example, below, Change next to the Phone Numbers setting was clicked so that a phone number could be added to the account. The section expanded, displaying a description of the setting and an Add Phone Number link. Always click the Close link (where the Change link used to be) to finish your changes, close the section, and move on.
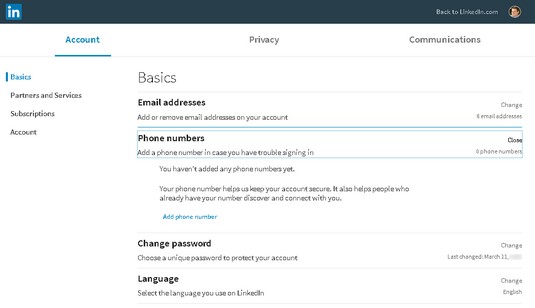 Phone Numbers setting expanded on the Settings page.
