

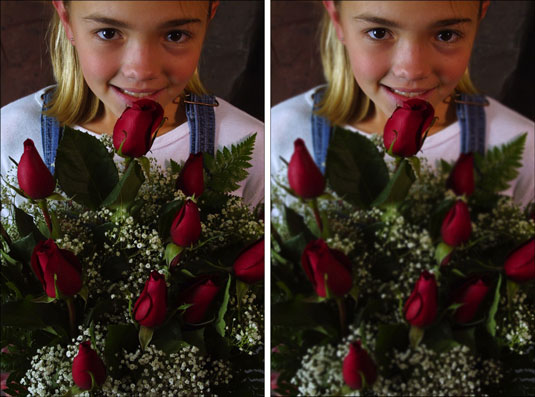
The Blur tool in Photoshop Elements can be used for both repair and more artistic endeavors. You can use the Blur tool to soften a small flaw or part of a rough edge. You can add a little blur to an element to make it appear as though it was moving when photographed.
You can also blur portions of your image to emphasize the focal point. The Blur tool works by decreasing the contrast among adjacent pixels in the blurred area.
Choose the Blur tool from the Tools panel in Edit Full mode.
Press Shift+R to cycle through the Blur, Sharpen, and Smudge tools.
Select a brush from the Brushes Preset Picker drop-down panel.

Be sure to use a small brush for smaller areas of blur. Larger brushes produce more extreme effects.
Select a blending mode from the Mode pop-up menu.
You have several choices, including Hue, Saturation, Color, and Luminosity.
Choose the strength of the blur effect with the Strength slider or text box.
The lower the value, the lighter the effect.
If your image has multiple layers, select Sample All Layers to make Elements use pixels from all the visible layers when it produces the effect.
The blur still appears on only the active layer, but the look is a bit different, depending on the colors of the underlying layers.
Paint over the areas you want to blur.
If you don’t like the results, press Ctrl+Z (cmd+Z on the Mac) to undo the changes and then lower the Strength percentage.

