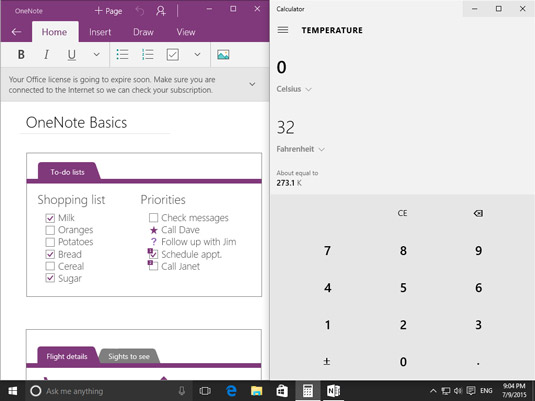
If you need to work with two apps at the same time in Windows 10, it’s a good idea to snap them side by side so that each consumes half of the screen. To snap one app to the left, use the mouse to drag the title bar of the first app to the left side of the screen.
A transparent overlay appears, showing you where the window will be placed. Release the mouse button to snap the window there. Now, click the app that you want to see on the right side. Here you can see two apps, snapped side by side.

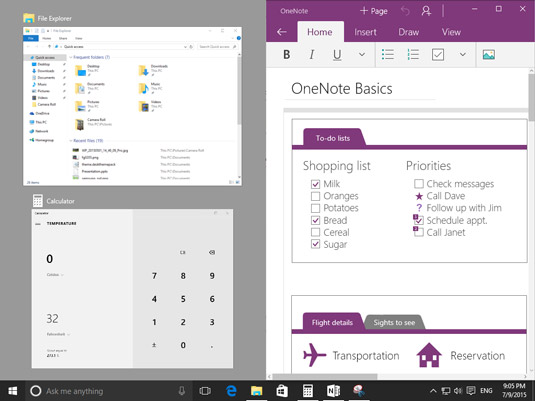
When you snap an app with the mouse on Windows 10, the new Snap Assist feature pops up. Windows 10 displays a thumbnail list of your open windows. Click one thumbnail, and its app snaps to the unfiled side of the screen. It’s faster and more intuitive than the Snap feature on Windows 7 and 8. You can see the Snap Assist feature in action below.

You can also press Windows+left arrow or Windows+right arrow to snap an app to the left or right half of your screen.
Windows 10 also adds support for vertical window snapping. For a reason known only to Microsoft, you can’t do this with the mouse; you must use keyboard shortcuts:
Snap the current app to the top half of the screen: Press Windows+up arrow.
Snap the current app to the bottom half of the screen: Press Windows+down arrow.
Maximize the window: Press Windows+up arrow twice.
Minimize the window: Press Windows+down arrow twice.
Windows 10 also gives you the ability to snap four windows at a time in a 2 x 2 grid. To snap a window in a 2 x 2 grid with the mouse, drag and drop it into one of the four corners of the screen. Drag-and-drop several windows in this way to get your 2 x 2 grid of open windows.

You can combine the Windows+left/right/up/down arrows to snap a window into a quadrant of your screen. For example, press Windows+left arrow to snap a window into the left half of your screen; then press Windows+up arrow to snap it into the top-left quadrant.
You can use any layout up to 2 x 2. For example, you could have one tall window on the left and two short ones on the right. Or you could have one wide window on top and two narrow ones on the bottom.


